¶ Attribute tables
The attribute tables contain all attributes for all vector elements for SHP and File Geodatabase (FDB) files. The attribute table is an inseparable part of the geometry inside the vector files. It contains all the "properties" of the geometry elements we would like to store inside the "layers" together with the geometry. In PCS, the user can check the attribute tables of the SHP files or File Geodatabases. If the user would like to modify the attribute structure of the SHP file, please check this article. If the user would like to modify the attribute structure of the FDB, please check this article. If the user is interested in extraction using attributes, please check the advanced extraction guide.
To check the attribute table, right-click on a SHP layer/FDB table and select View Attribute table.

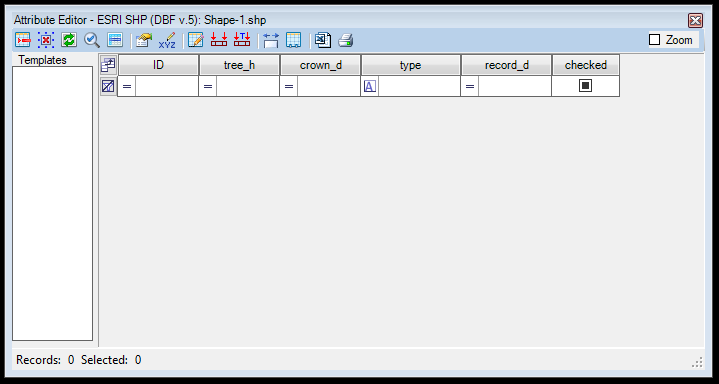
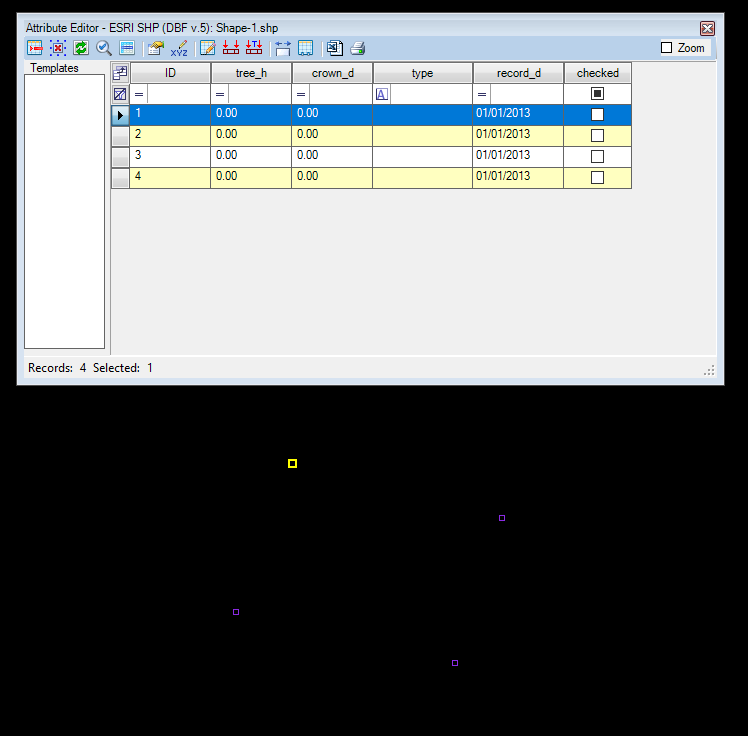
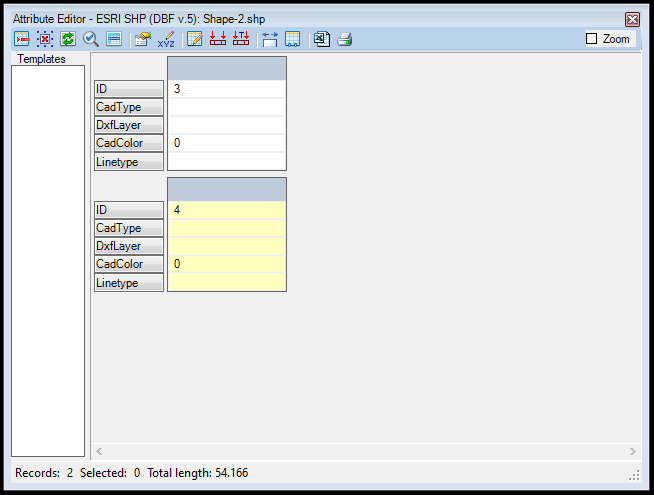
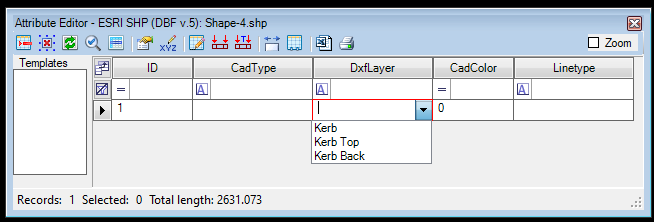
If the user creates an empty SHP, the attribute table will have no attributes, just the default ID field, which has an increment and cannot be removed. If the user opens an SHP or FDB from another source, it will use its attributes and values. If no geometry is extracted from the SHP file, the user will see only the header and the attribute filter in the attribute table, like in the image above. If the user extracts content, each geometry has a separate record with attribute values, which the user can change. The active record is highlighted in yellow on the 2D view.
The definition of the attribute table's user interface is the following:
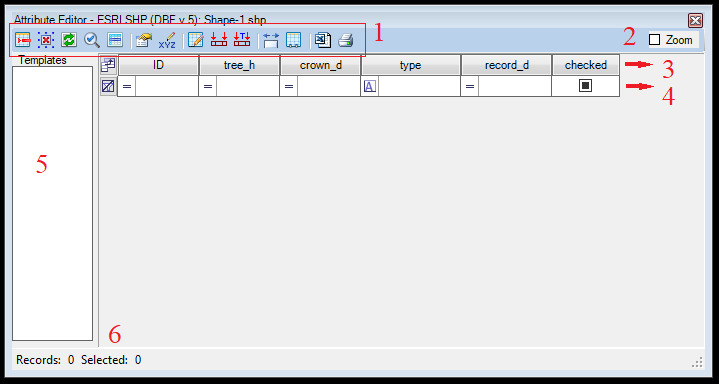
- The Attribute table toolbar. See the extended description below.
- Zoom checkbox - If checked, the 2D view will zoom to the extent of the selected records.
- Attribute header with the fields/columns/attributes for the SHP.
- Filter options for the records. See the extended description below.
- Templates - You can find the pre-defined templates here. The extended description of the templates can be read in this article. The use of the templates is described in the advanced extraction guide.
- The number of all and selected records. If the SHP is polyline type, you can find the total length of the polylines in the SHP here; if the SHP is polygon type, you can find the total area of the polygons in the SHP here.
¶ Attribute table toolbar
The attribute table toolbar is essential to the window as the user can control selection and attribute content from this page. The attribute table toolbar has two states - active (if the SHP to which the attribute table belongs is active) and inactive. If the attribute table belongs to an inactive SHP, a "Current" button appears. If the user clicks it, the selected SHP becomes the active SHP. Please note that the user can modify the geometry of the active SHP only, as work "is done inside" the active SHP, but the attributes of the inactive SHPs can still be modified! Please read this article about active objects for more info.


The definition of the toolbar tools are the following:
- >> Current - Make the attribute table's SHP file the active SHP file
- Delete Selected Row - Delete the selected records in the attribute table. If no record is selected, nothing happens. This tool is valid only for the current attribute table (if other attribute tables have selected records, those won't be affected). If one or more record(s) are chosen, the software will prompt the user to remove the records. The software will always prompt the user to confirm if the removal was initiated from the attribute table side. The undo command can undo this operation if some records are accidentally deleted.
- Clear Selection - Clear the selection so no record remains selected in the current attribute table.
- Invert Selection - Invert the current selection: every selected record will be unselected, and every unselected record becomes selected for the current attribute table.
- Find selected on view - The 2D view will zoom to the extent of the selected record's geometry (find the record on the 2D view).
- Find selected on Attribute table - If the user selects one or more elements in the active SHP in the 2D/3D views, the function will scroll the attribute table to the location of the record.
- Show selected on Google Maps - Open the Google Maps view and jump to the selected element.
- Properties - The properties of the SHP file. See the Properties article for a detailed description.
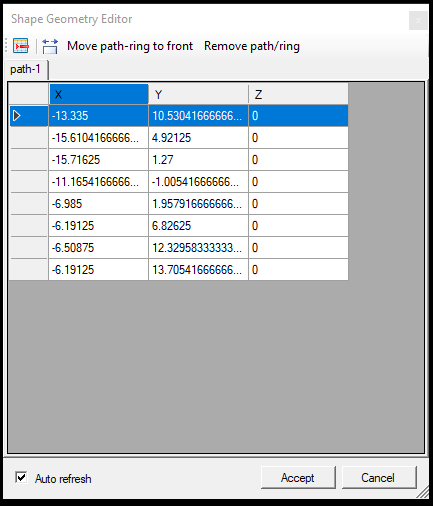
- Edit Geometry - This function requires a single record to be selected in the attribute table. If the record is selected, the function will open a new window where the user can edit all vertexes of the selected element. The user can remove vertexes or modify the coordinates manually. If the selected record is a multi-element (e.g. MultiPolygon), the user can switch between the geometry parts with the tabs at the top of the page.
- Template editor - The function can be accessed from a different location. See the Templates article for more information.
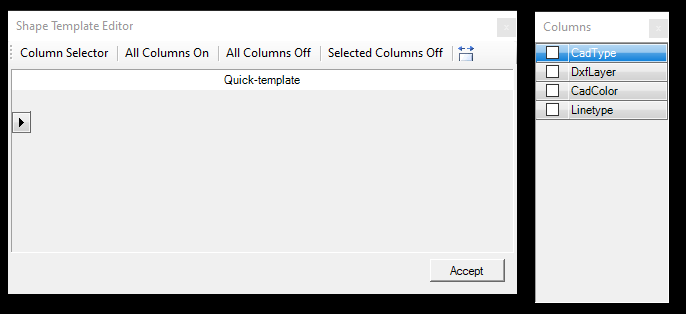
- Apply Quick-template for the Selected Rows - This function allows the user to adjust one or more attributes at once on the selected record(s). The user can batch-update the attribute values. When the user starts the function, the column selector will appear. In this window, the user can select some or all attributes to be updated.
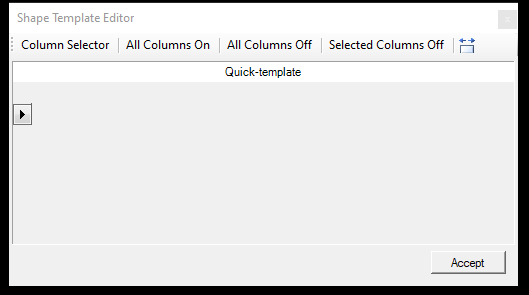
If the user presses All Columns On or Off, it will select or deselect all columns. If the user uses the Column Selector, a new window will appear where the user can check the required attributes. After the user selects the attributes, close the Columns window with the X in the top right corner.
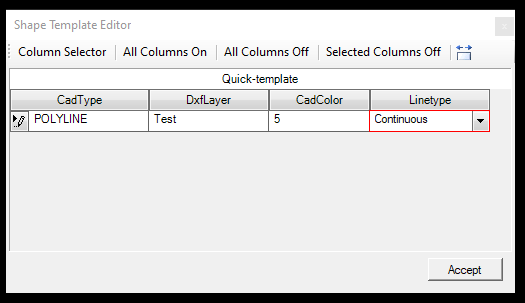
After the columns are selected, the user can assign the designated value, and when accept has been pressed, the values will be updated accordingly.
- Apply Template to Selected Rows - Apply the selected template to the selected records. See the Templates article for more info.
- Toggle AutoFit Columns - Toggle switch to set the attribute columns to fit the current size of the attribute table window. This setting is dynamic upon resizing the attribute table, and if turned off, the size returns to default.
- Toggle Card/Grid view - Switch the attribute table display from columns/rows to card display and back.
- Export to Excel format - Export the attribute table to Excel (.xls) format using the same formatting seen inside PCS. Coordinate export is optional for point SHP files.
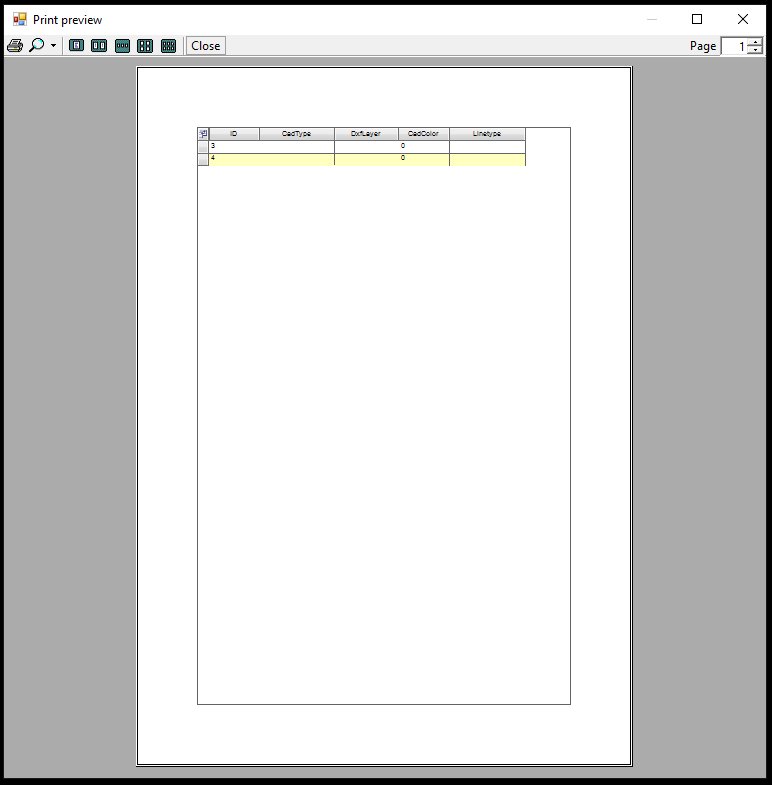
- Printing - Print the attribute table using the default printer. The user can adjust the page settings at the printing preview.
¶ Filter records
As presented above, the attribute table has the option to filter the records. The filter limits the display of the attribute table and will not affect the display of the vectors in 2D/3D view.
The header contains a few icons, which can be used to filter the records:

The numbers refer to the following functions:
- Turn on/off columns - The user can turn on or off some columns if they need to be hidden. This function only hides attributes, not removes them.
- Clear ALL filter criteria - Resets all filters to empty; all records will be displayed again.
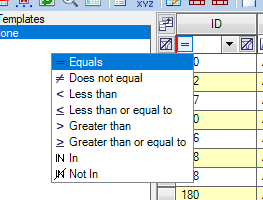
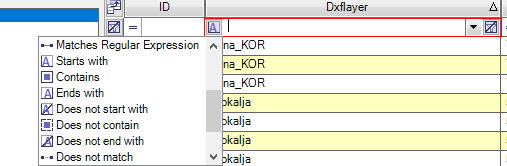
- Set the filter operator - The user can select from a dropdown and provide a value to filter the results. Different options apply for numbers and strings.
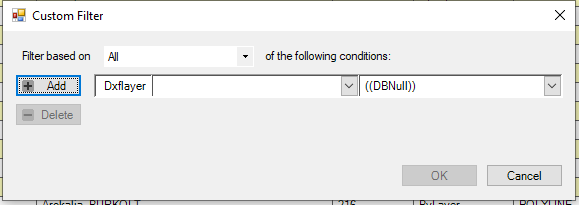
4. Use this dropdown menu to select a discrete value to filter. The user can choose Blank, Non-Blank, Custom or specific attribute values to filter the records for. When the user selects "Custom", a new window appears where the user can set their expression to filter.

5. Clear the current criteria - The filter will be reset to empty.
Only after the user sets their criteria will those records that meet the requirements be presented.

¶ Select and modify records
In the attribute table, users can select one or more records using CTRL and SHIFT commands, like in the regular file selection in File Explorer. To do this, the user needs to choose the records at the start of the records at the marked location:

Clicking on any attribute value will reset the selection, and some drawing commands can also reset the selection.
After the user selects one or more records, the user can right-click anywhere in the selection area to show the right-click menu, which can be used to adjust the records:
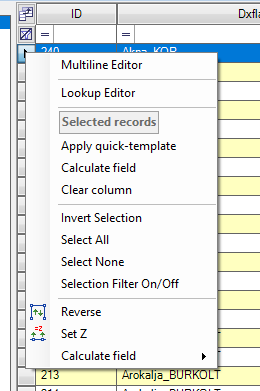
The definition of the tools are the following:
- Multiline Editor - Allows the user to format the text-based attributes to multiple lines in the display - currently unavailable function.
- Lookup Editor - The lookup editor allows the user to create a dropdown list for the attribute value, which can be used instead of the type-in method. The editor can be used only if an SHP file is already saved; an error will appear if it is not saved. The user can use the field as usual if the lookup editor is empty. If the lookup editor has values, the user can still enter custom text/numeric values. After starting the tool, the Lookup Editor appears.
Right-click on the grey area and select Add Row to create a new option for the dropdown list. If the row is added, the user can specify a value (coded into the attribute table) and a name (which will appear in the dropdown). In that way, the user can select from a list instead of typing in values.
The values for the lookup editor are stored in XML files along with the other SHP files. The lookup editor and the stored values are unique to PCS and cannot be used in other GIS software.
- Apply Quick-Template - Apply quick template over the attribute where you right-clicked. It cannot be used on the ID field. It works like the Apply Quick-Template at the attribute table toolbar.
- Calculate field - Currently unavailable function.
- Clear column - Clears the value of the selected records. Those attributes will be reset to <Null> value where the right-click has been placed.
- Invert Selection - Invert the selection inside the attribute table
- Select All - Select all records
- Select None - Clears the selection
- Selection Filter On/Off - Toggle field - If active, only the selected records will be shown
- Reverse - Invert the geometry direction for polyline or polygon-type elements
- Set Z - Set an elevation for the selected record(s)
- Calculate field - The software can calculate - taking into account the respective SHP type - The 2D length of the record, the 3D length of the record, the 2D area of the record, fill the X, Y or Z value of the point's coordinate
Some attribute table operations can be used in the drawing area; these tools are described in the shape toolbar article.