¶ Compare LAS Z values
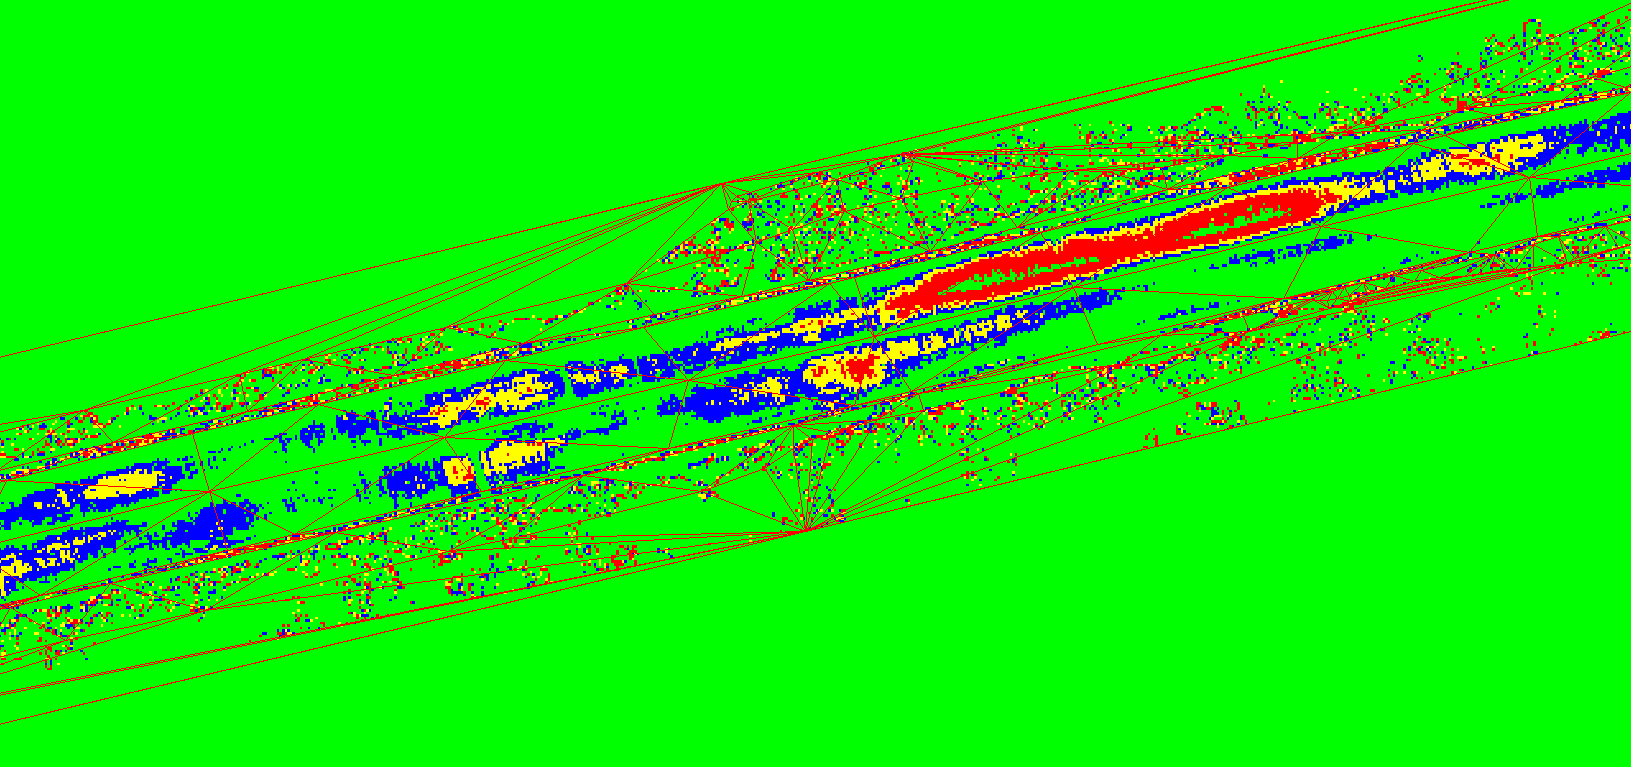
This function allows the user to crosscheck a surface against the point cloud, which can be a very effective tool if the user wants to check the vector extraction's quality and whether it's within the threshold. The function will generate one or more raster file(s) from the input data to show the difference between the cloud and the surface as colourized raster cells.
To run this tool, the user has to create or have a triangulated surface created with the Triangulator, which can be accessed only by right-clicking the TRI file in the project explorer. After the function is selected, the following setting panel will appear:
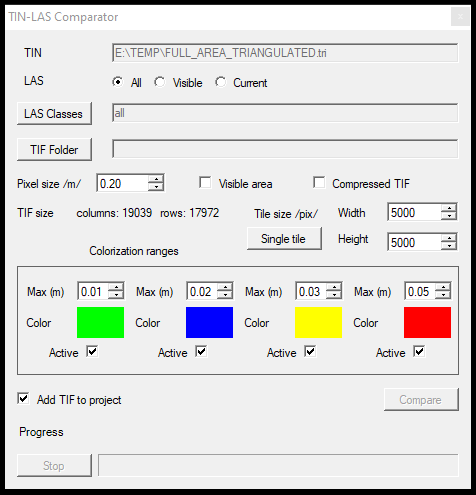
In this setting panel, the user can customize the output raster. The description of the settings are the following:
TIN - This is the input TIN file on which the user right-clicked.
LAS - The user can select which LAS file(s) will be used for the comparison process. The user can use all loaded LAS files inside the project, only visible ones ( not turned off) or currently active LAS files.
LAS Classes - The user can filter which classes shall be used for the comparison. If the cloud is properly ground classified, it might be best to use only the ground class. To change this setting, click on the LAS Classes button, and uncheck the not required classes.
TIF Folder - Specify the output folder for the TIF file(s). Click on the TIF Folder button to specify the location. If this setting is not set, the user cannot start the process, and the Compare button will remain inactive.
Pixel Size /m/ - Define the output raster's pixel size in meters. In the given example, it is set to 20 cm, which means that each pixel represents a 20x20 area, and within this area, the pixel's colour will represent the difference from the surface.
Visible Area - The raster will be generated only for the 2D view area.
Compressed TIF - Generates a compressed TIF.
TIF size - This setting allows the user to adjust the output TIF size. The software will calculate the output raster size based on the LAS settings. By the format limitations, the TIF file cannot be bigger than 2 GB, which means if the whole area is more significant than a single file that fits into 2 GB, it shall be tiled. The default tiling size is 5000x5000, but the user can adjust this according to their needs, considering the pixel size in actual dimensions. A single tile option is available only if the total size is not bigger than 2 GB. The software inspects the whole area and uses the biggest extent of the area, which - in most cases - will result in several empty tiles. The software will generate these, but they will be completely blank (difference under 1 cm). During the process, the software will indicate how many tiles will be created and what is the status of the process. This progress might take a longer time. The output tile file names will be aligned with the top left corner's XY coordinate for easier identification.
Colorization ranges - These settings allow the user to customize the output raster. The user can adjust four categories and turn them on/off if there is no need for as many classes. The user can adjust the difference with the up and down arrows to match the needs. The colours can be changed by clicking them and picking a new colour.
Add TIF to project - Automatically load the finished rasters to the project.
We strongly recommend that our users take their time to find the proper settings and consider the classification as well. This tool might highlight some errors that are not considered errors.