¶ Saving
Saving is an essential thing, and it is crucial to understand how the save functionality works in PCS.
One of the most important things the users should acknowledge is that PCS has no autosave function. The software will warn users to save their work, but it will not save if they do not press Save.
On this page, we describe the traditional save functions.
In PCS, users can save the following elements:
If the user wants to save an element, right-click on the selected element(s) and press save. The software prompts the save dialogue, where users can select the file paths for the elements and save, or if everything is set, the save is performed without any sign.
As mentioned, users can save using right-click on the selected file(s), but above this, the following save buttons can be used:
- File menu > Save all - This will save the project file and all vectors and clouds (if the clouds are modified)
- Save Project File - Main Window - Standard Toolbar - This will save only the project file, and the vectors and clouds will not be saved.
- Save Current Vector - Main Window - Standard Toolbar - This will save only the active vector file.
It is important to highlight that if users save only the vector files but not the project file, and anything unexpected happens when the project is loaded back, the project file will restore the previous project state (window location, clip frame location) and all saved vectors. It might confuse inexperienced users initially, but if vectors are saved frequently, the project file will point to the wrong place, but the data is not lost.
To prevent potential data issues when users save all vectors, PCS will create a backup ZIP file, which will have the same name as the SHP file with a timestamp. For example, if the user has an SHP file called Roads.SHP and it is saved in PCS; it will create a backup like Roads-shparch08212023155315.zip. This is a backup ZIP file from the SHP file created on the 21st of August, 2023, at 15:53. If the file is unzipped, the resulting SHP will be a backup from the mentioned time. If the backup shall be used, it is recommended not to overwrite the original SHP file but to extract the archive into a separate folder.
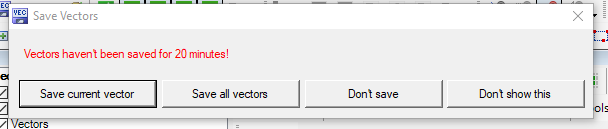
As mentioned, the software will warn the users to save vectors using the Save Warning window. The default warning period is 10 minutes, which can be changed in General Settings. When the warning window appears, it prompts four options:
- Save Current Vector - This will save the current active vector
- Save All Vector - This will prompt the vector save window - without the project file - to save all vectors
- Don't save - Close the window without saving anything, and the warning will appear again after the set time interval
- Do Not Show This - This will turn off the save warning function for the current session, but it will turn back on the next start of the software.
If save all is selected, the vector save dialogue will appear.
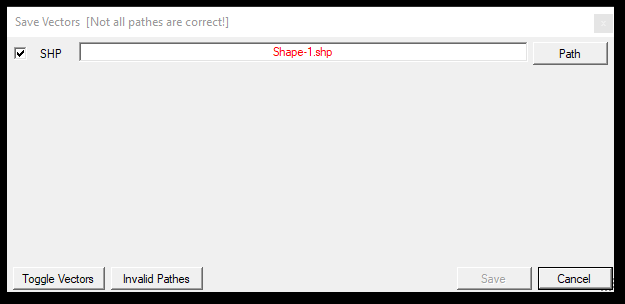
Here, users can select which vectors or clouds shall be saved by checking/unchecking the checkbox at the beginning of each line. If the name is red, the file path is not set. In this case, click on the Path button to browse the location where to save the file and what the file name should be. After that, the name will turn to a full file path with black, meaning it can be saved. The save button remains inactive as long as a minimum of one vector is selected for saving with no file path. If all file paths are set, the save button can be pressed. Turning vectors or elements with an invalid file path on and off also enables the save button.
¶ Trivia
- If multiple undocked windows are opened, and the save warning window opens, it might get stuck behind an undocked window. When this happens, users cannot interact with the software until the window is closed. This might make the software feel stuck, but this is not the case. Use ALT+TAB to roll over the open windows and find the save warning window. Even if it is not visible, it's active. Press space and it will save the current vector, and the window will disappear.