¶ Snap toolbar and snapping basics
Using the snap toolbar in PCS and understanding its logic is crucial to working productively and utilising the software. As PCS is more like a GIS tool than a CAD one, the snaps work differently than in CAD. The user will not find anything like snap to nearest, perpendicular, endpoint, centre point, etc. PCS uses five snap modes: free point snap, point cloud snap, vector snap, auxiliary plane snap, and clip frame axis snap. The three main snap modes that the user most probably interacts with are the free point, point cloud and vector snap, but we also explain the other snap modes.
Using the hotkeys for the snap modes is essential for the productive use of the software. The developer's recommendation (and the default for the fresh installs) is Q - free point snap, W - point cloud snap and E - vector snap. In that way, the change of the snap modes becomes rapid during extraction.
Inside PCS are two general states: outside of command (when no command is started, the mouse cursor is a standard arrow pointer) and inside command (when the mouse cursor is different, it can be an arrow with an additional icon or crosshair). If the user is not in an active command, the snap modes are still active, and this can affect the overall experience as the user won't be able to change the rotation centre in the point cloud if the point cloud snap is not active. Each PCS command has a default snap setting. This can be selective (the user can select which snap modes shall be used) or mandatory (for example, to move a vertex, the first click shall be a vertex anyway, so the snap modes are locked to the vector; the user cannot change this).
Before we go deeper into the description of the snap modes, we need to discuss the "temporary elevation value".
¶ Temporary Elevation Value
The temporary elevation value is a non-visible value stored inside the software in the background. Users commonly do not even realise that this value is extracted and stored. The temporary elevation value is "taken" from the 2D view. As the user hovers the mouse over the point clouds and vectors, a small red circle appears around the cursor according to the active snap modes. The elevation of this point (point cloud or vector) will be stored in the temporary elevation value in the background. The newer PCS version (October of 2023 or newer) also displays this elevation value along the cursor; see the images below.
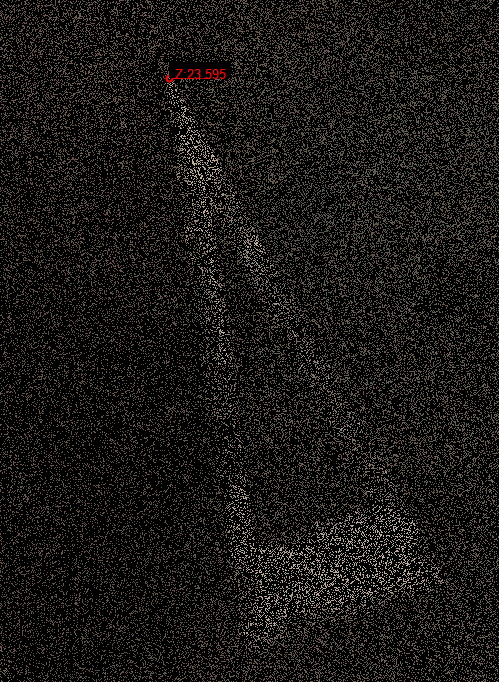
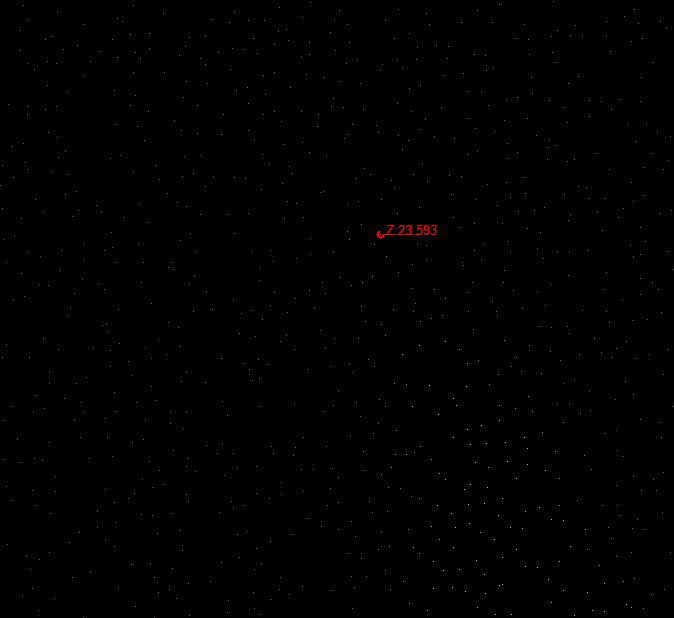
The temporary elevation updates automatically. The user cannot stop this mechanic. This means that if the user is unaware of the operation of the snap modes, the currently active snap modes, and the fact that the mouse moves, this value will be changed. This function has the most significant impact on the free point snap mode; see the description below. If the user wishes to keep the same temporary elevation in the background, do not hover the mouse over the point cloud with an active point cloud snap (same for vector snap and vectors). In general use cases (if the user is not using the free point snap), the temporary elevation is unimportant; the user shall not pay attention to it at all, but understanding it is fundamental. It can indicate that the users are using the wrong snap mode, for example, when they hover through the point cloud, but the red circle does not appear. The point cloud snap is inactive, as the temporary elevation value updates only (and the circle and the Z value are displayed only) if the respective snap mode is active.
The default temporary elevation upon starting the software is 0.00. The temporary elevation can be updated upon modification of a vector. For example, if the user adjusts the elevation of a vertex, the vertex's last elevation will become the temporary elevation value.
After the basic concept, let's see the snap toolbar itself:
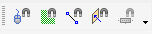
The snap toolbar is located in the main window, and the order of the icons is the same as described above. If a snap mode is active, the icon will be highlighted, and the magnet icon will become red.
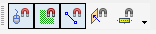
If one or more snap modes are greyed out, the snap mode is unavailable for the current function. For example, when the user starts a vector-based tool, it will probably require a vector first, so the users are limited to vector snap.

The use of each snap mode is the following:
¶ Free point snap
The free point snap - as the name suggests - allows the user to "snap everywhere". This technically means this snap mode will snap to "the space". The user cannot snap to point cloud or vector vertex using this snap mode; however, this is the favourite snap mode among the most experienced users. Understanding the free point snap can reduce the use of other modification tools.
IMPORTANT! - NEVER USE THE FREE POINT SNAP IN 3D VIEW! - As the free point snap can snap to any point of the space, it will do it from the current 3D perspective. It means that from the user's point of view, the point has been placed in the correct location, but if the camera is rotated, it will fall behind/above the point cloud.
Except for very few exceptions, the free point snap is handy in 2D view. It will allow the user to draw vectors without point clouds or vectors. This snap mode can extract from rasters or freely draw something from the cloud. When the user uses the free point snap in 2D view, the XY coordinates will come from the mouse's position. Still, the elevation is assigned differently: the free point snap uses the temporary elevation. Let's take a few examples for better understanding:
- When the user starts the software and no point clouds or vectors are loaded (or vectors with 0 elevation loaded), and the temporary elevation has not been updated (the user has not hovered over the mouse over point clouds/vectors with the respective snap mode on), the elevation during extraction will be 0.00.
- When the user opens a point cloud and hovers their mouse over the point cloud with an active point cloud snap, the temporary elevation will be continuously updated. As we are in 2D view, and there is a tree in the point cloud, the elevation can also be at the ground level or the top of the tree. The last elevation will be used for the newly created vectors using free point snap.
- The free point snap can be used when the user works with point cloud snap but wants to move the kerb lines without modifying the elevation. The user turns on the point cloud snap (with hotkey!!!), updates the temporary elevation, turns off the point cloud snap (with hotkey!!!), and moves the vertex using free point snap (paying attention to that, when the user selects the vertex, the point cloud snap HAS NOT BEEN TURNED ON, as it would update the temporary value). The vertex will maintain a temporary elevation after the movement. In that way, the user can modify objects in 2D view keeping the same elevation.
- When the user has the proper elevation in the temporary elevation value, the user can place as many vectors to the same elevation as needed. For example, suppose the user has a building layout and needs to have it in a single elevation; pick a temporary elevation, and when using the free point snap, the layout will be extracted at the designed elevation.
- When the user wants to move vertexes while keeping their elevation, free point snap can be used, as when the user starts to move vertex command, only vector snap will be active when the user hovers their mouse over the vertex. The temporary elevation will be updated. The user clicks the vertex (and make sure that only the free point snap is active when the user moves the mouse because if it is also active, it may snap to a point cloud point and update the temporary elevation value). The user can move it, and it will keep the same elevation.
- The users can also utilize the fact that they can extract anywhere. The free point snap is also perfect if the elevation is not essential or if the user can/wishes to adjust it later. For example, the user tries to extract tree locations. The user can put a point in the middle of a tree, even if there is no point cloud point, and then adjust the elevation later with one of the modification tools.
It is highly recommended that the user tests the above-described functions, as the proper understanding of the description provided so far will significantly impact the user's work.
¶ Point cloud snap
The point cloud snap allows the user to snap to the point cloud. When the user clicks using a tool with an active point cloud snap, one point cloud point will be used. The software will interpolate the cloud point clicked from the camera's viewpoint. In 2D view, this means that the snapped point can be high or low (for example, if the user clicks on a tree point cloud, it can snap to the top or bottom of the tree as well, depending on the cursor location), and in 3D the same rule applies. The snap itself is highly comfortable; it will always snap to the point the user wants to snap - except if the cloud is messy. In standard extraction scenarios, this is the most commonly used snap mode. The point cloud snap mode has a few adjustable settings at the 3D main toolbar, but we strongly recommend using the standard settings and experimenting at your own risk.
We do provide a few examples when we think the point cloud snap is the best:
- If the users have some objects, they can extract them in 3D view using the point cloud snap, and the points/vertexes will be snapped to the point cloud.
- The user has an ALS/ULS point cloud, and surface points at the key locations are needed. The user can use the point cloud snap to snap to the surface.
- When the user modifies a point/vertex because it's snapped freely or the dataset has a wrong location/elevation, this snap mode can move the point/vertex to the point cloud.
¶ Vector snap
The vector snap can snap to any vector point. As PCS is a GIS-based software, the user can snap to points and vertexes and not snap to the middle of the line if there is no vertex (so no perpendicular or nearest snap as in CAD). Vector snap works in 2D and 3D for SHP and FDB formats and in 3D for loaded DXF/DWG files. It works with point, polyline and polygon-type SHP/FDB tables, and the user can snap to all layers (not just the active SHP).
We do provide some examples for vector snap as well:
- The users have polylines, but the lines shall be connected to existing lines. The best practice here is to switch to vector snap only, select the vertex where the user wants to connect to the new line, change the snap mode to point cloud snap only (or free point snap only) and continue the extraction. The lines will be connected.
- The user has a DXF/DWG drawing that needs to be connected with lines from the current drawing. In 3D, the user can use the vector snap to connect the elements to this drawing.
- Some functions use this snap as a default in some stages; for example, when the user starts the Modify Vertex command, the first thing done is to select a vertex, so the vector snap is locked until the user chooses a vertex.
- It is also widespread that the vector snap is used to modify existing drawings, like snap endpoints together in existing lines or polygons.
¶ Auxiliary plane snap
The auxiliary plane snap allows the user to use the pre- or user-defined auxiliary plane and extract vectors on this plane. It's like cutting the cloud with a plane and drawing to that plane. The auxiliary plane is one of the most complex functions used in PCS; see the respective article. This snap mode is rarely used, primarily for special purposes like facades or layouts or extracting a particular section of the point cloud.
Use the auxiliary plane:
- In case the user needs to extract in a specific plane, for example, XY, XZ, etc.
- This snap mode is handy when the user extracts facades or layouts. The user can trim the cloud and use this snap to have a layout in a single elevation or a specific location.
¶ Clip-frame axis snap
The clip frame axis snap is not visible by default on the snap toolbar. It can be used nearly the same as the auxiliary plan snap, but the user cannot modify the plane. The plane will always be the centre axis of the clip frame, marked with the dashed line at the centre of the clip frame, and it will always be vertical. This snap mode is only available if the user uses the profile mode from the clip frame toolbar. The most common use case is to extract cross sections from road surfaces, which can also be used for facades.