¶ Navigate toolbar
The navigate toolbar in the 2D view allows the user to navigate in the 2D view and control the displayed content.

The description of the tools is the following:
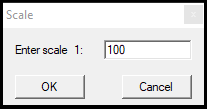
- Scale factor - This is the current 2D view scale factor, which represents that one cm in the screen how many cm in real life. Same as the map scale. The scale factor is automatically adjusted based on the zoom level in 2D as the user uses the mouse scroll. If the scale has been selected, the scale factor window will open, where a custom scale can be set. The scale factor cannot be smaller than 1:1. The scale factor duplicates/halves as the user scrolls in and out.
- Zoom All - Zoom to all content in the project in 2D view. Suppose the project contains empty SHP or data in WGS84 projection; it might result in an optically black screen, as the extent, in this case, will extend to a view where two opposite corners will contain data (the dataset in proper coordinates, and the other corner is around 0,0 coordinate). If zoom all is pressed, and the result is a black screen with a vast scale factor, that might indicate a data error.
- Zoom by rectangle - This tool allows the user to turn the cursor into a rectangle, and the zoom will focus on the clicked area.
- Zoom In/Out - Zoom in or out one level (double/halve the scale factor). It's the same as scrolling. These buttons will not appear by default in the toolbar.
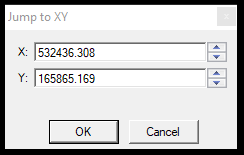
- Jump to XY - This tool will open a window where the user can enter coordinates, and the 2D view will be centred on the location, keeping the same scale factor.
- Jump to Clip-frame - This tool will move the 2D view's centre point to the centre of the clip frame, keeping the same scale factor.
- Automatically jump to the current geophoto - This toggle allows the user to sync the 2D view with the geophotos as the user moves between them using the Photos toolbar on the 3D view.
- Clip-frame center in Google Maps - This tool opens the Google Maps Window based on the centre of the clip frame. This function works properly only if the projection has been set inside the Project Explorer.
- Google Window Sync - When activated, assuming the projection is set properly, and the Google Window is opened, it will sync the 2D view movement with the Google Window. It is grey when turned off (by default) and coloured when turned on. It can be used in map view or satellite view as well. The sync does not cover the zoom level the user shall set the zoom level in the Google Window, and the sync will sustain the same zoom level. If the user uses the street view in the Google Window, and the sync is active, it will exit the streetview level, and pan further with the map/sattelite view.
- Show Clouds - Turn on and off the point cloud display. This toggle turns the point cloud display on and off only for 2D view. This setting is remembered after the restart of the software, so make sure it is turned on if the cloud is not visible. If it's turned on but the cloud is still not visible, check the article stating that the point cloud is not visible.
- Show TIN - Turn on and off the on-the-fly TIN display for the 2D view. The use of the function might increase loading time for 2D view. The visualised TIN is not generated physically; it has only a display purpose. The triangle colours are adjusted to the current display, so it is possible to utilise this function for all colouring options.

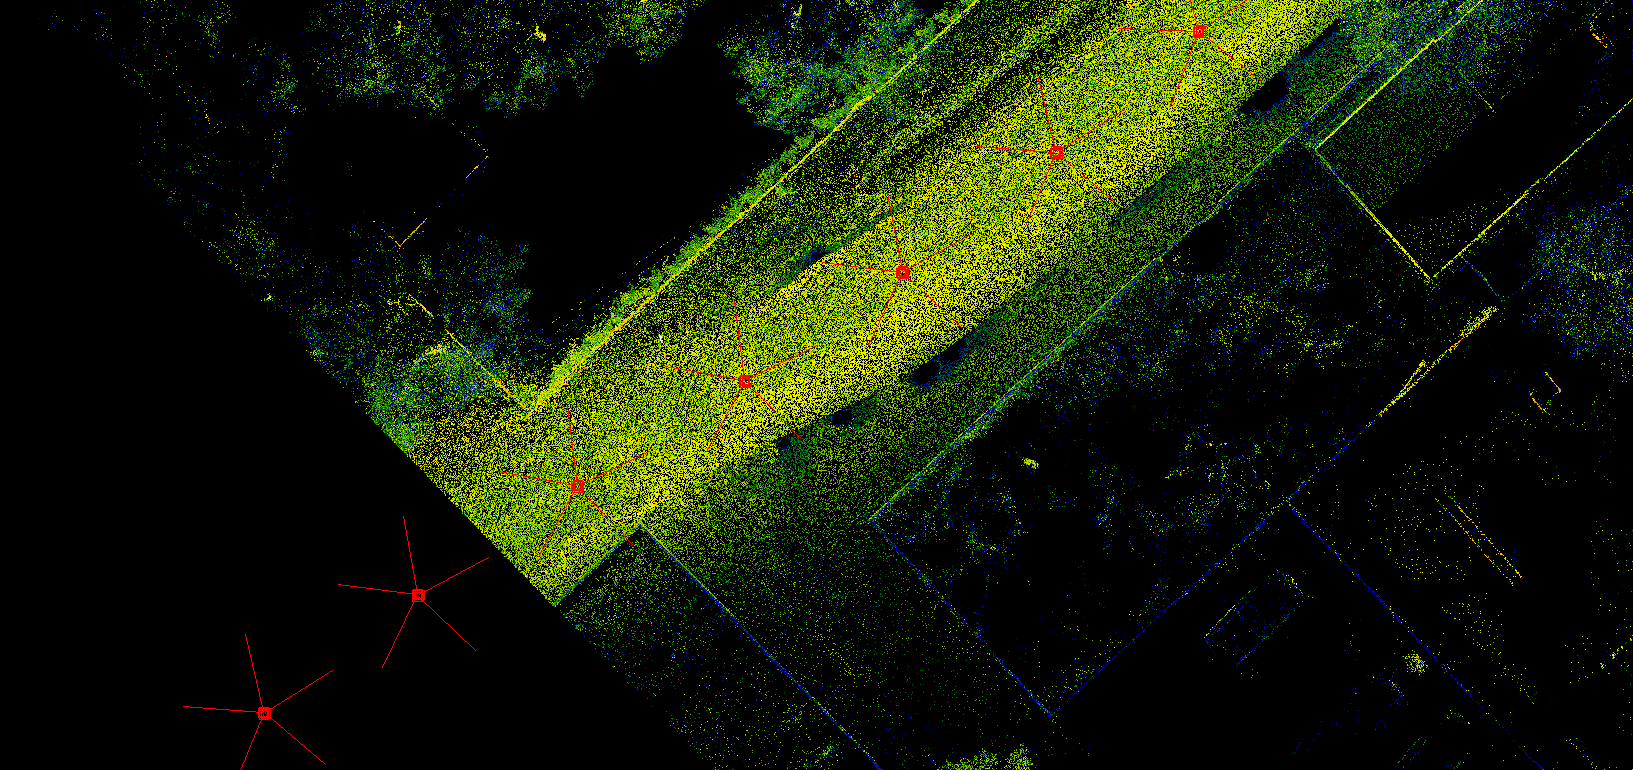
- Show Geophotos - Turn on and off the visualisation of the geophoto locations and directions. The geophotos are displayed as a red rectangle with a small line, where the line shows the camera axis direction. One marker will be presented for each camera device. If the camera devices are located next to each other (exact case), they might appear close to each other (for example, Ladybug Camera).
- Cloud On/Off - This tool allows the users to turn on and off point cloud files by clicking on the 2D view. In that way, the tiles that are not required can be turned off manually. Works the same as the Rasters On/Off at the Raster Toolbar.
- Clouds on by viewport - When this tool is used only those LAS files will be turned on (or remain turned on), which are visible in the current 2D view extent. In that way, the currently not required point clouds will not occupy hardware resources. The project manager will turn off all point clouds outside the extent of the 2D view.
- Decrease/Increase point size - Decrease or increase the point size in the 2D view display.
- 2D view settings - The user can adjust the 2D view settings in this panel. See the descriptions below.
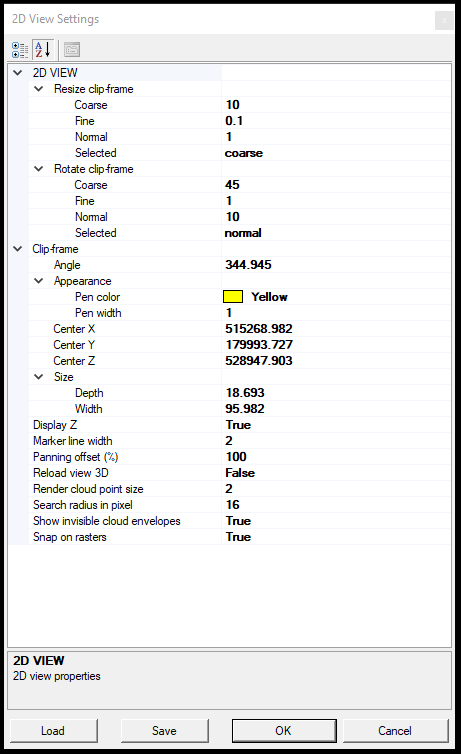
Resize/Rotate Clip frame - Coarse - Fine - Normal - Selected - Currently disconnected function settings.
Clip frame - Angle - The rotation angle value for the clip frame. It can be modified manually and aligned with the clip frame position in a 2D view.
Clip frame - Appearance - Pen Color - The clip frame display colour.
Clip frame - Appearance - Pen width - The clip frame's displayed line width.
Clip frame - Center X/Y/Z - The clip frame's centre position coordinates. It can be adjusted manually.
Clip frame - Depth/Width - The clip frame size in 2D view.
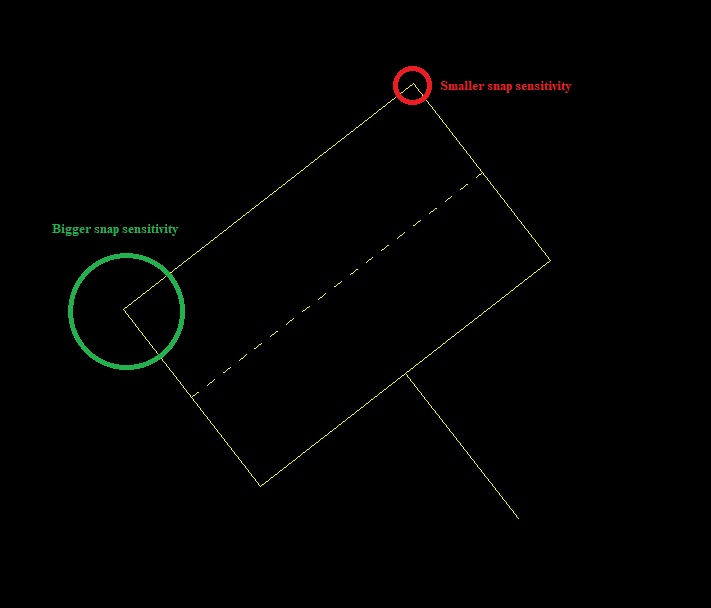
Clip frame - Snapping distance - This setting allows the user to adjust how close the cursor shall be moved to the corners/sides to rotate/resize the clip frame in 2D view. If the number is smaller, the cursor shall be exactly moved over the adjustment point, if it's bigger the rotation and resize can be initiated further.
Display Z - If a tool is active - considering the respective snap modes - the cursor will display the current position's Z value. If the value is True, the Z value will be displayed; if set to False, it will not.
Marker line width - This setting can affect the temporary (not accepted) linework's display line width. If set higher, the unaccepted linework will have a thicker display line in 2D view.
Panning offset (%) - When the user moves in the 2D view using the arrow keys, this setting allows the user to set the amount of movement. If it's set to 100%, the 2D view will be moved to left or right with the complete width of the 2D view, or if it is set to 50%, only half of the width will be used.
Reload View 3D - If this value is set to True, the 3D view automatically reloads after the clip frame has been placed with one of the clip frame placement tools from the clip frame toolbar. The reload is not initiated if the clip frame has been moved manually.
Render cloud point size - The size of the point cloud points in the 2D view. It can be changed manually or using the above-described Decrease/Increase point size tools.
Search Radius in pixels - This setting allows the user to adjust how close the cursor shall be moved to the corners/sides to rotate/resize the clip frame in 2D view. If the number is smaller, the cursor shall be exactly moved over the adjustment point, if it's bigger the rotation and resize can be initiated further.
Show invisible cloud envelopes - When TRUE is set, and the Show Envelopes option is enabled from the Project Manager/Clouds right-click menu, the turned of cloud's envelopes remain visible as greyed out when the cloud itself is turned off.
Snap on rasters - PCS is capable of snapping to raster pixels, where the elevation is encoded into the geotiff file as black and white values. If the value set to True, the snap can be performed, and even using free point snap mode, the software can assign elevations based on the raster pixel values.
If needed, the 2D view settings can be saved to an XML file and loaded from an XML file.