¶ Point Cloud Toolbar
In PCS software, there are various options to colourise the point cloud, and the point cloud toolbar in the Main Window is the panel where the user can adjust these settings. Please note that some tools might not be turned on for the toolbar by default.

The description of the tools are the following:
Colour settings dropdown menu - This menu controls the point cloud display in all views. The following options are available:
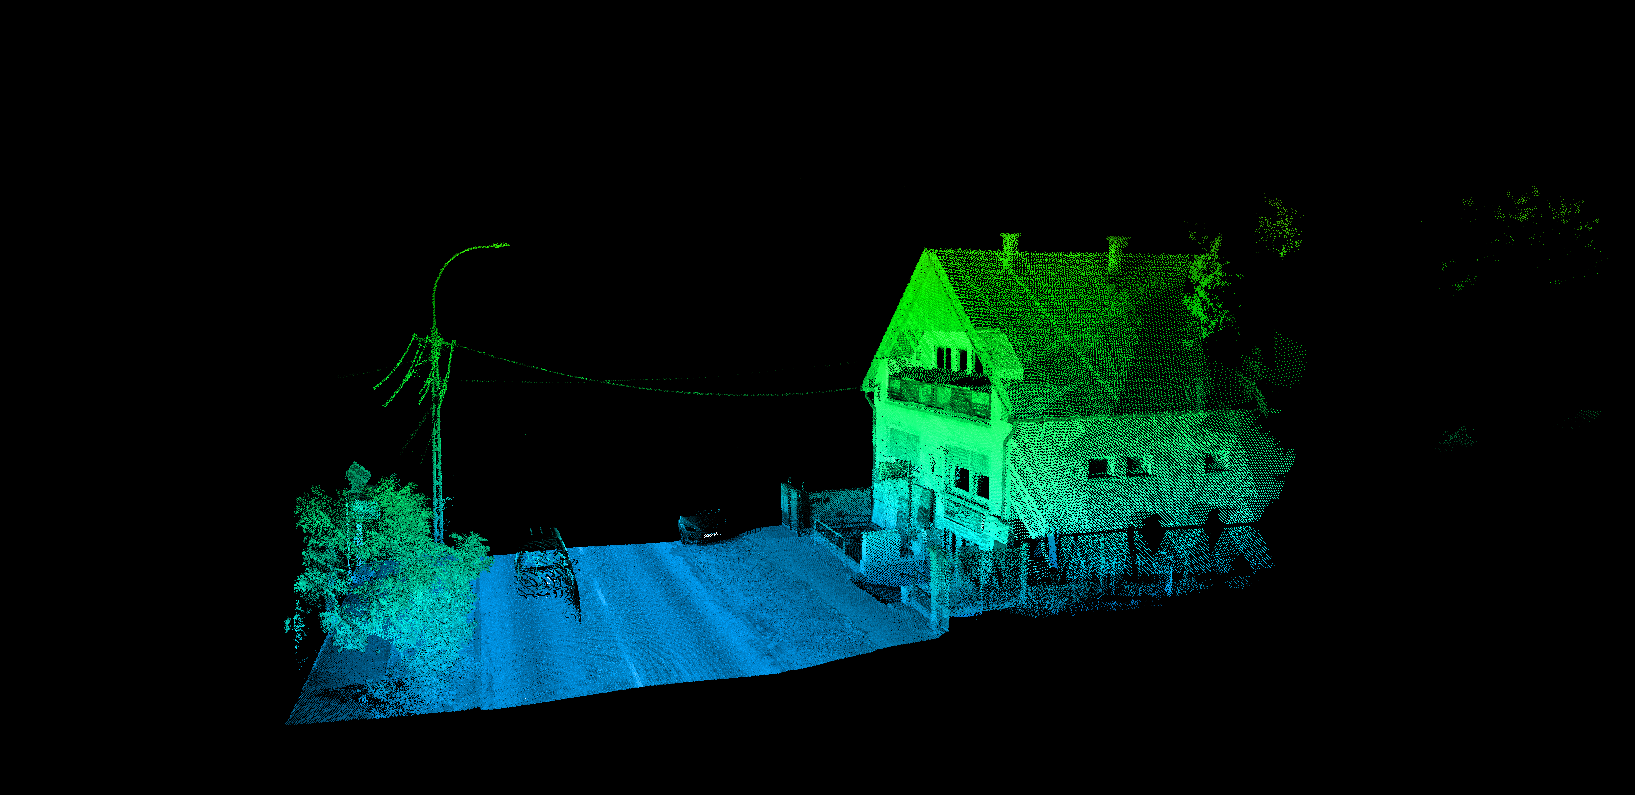
- Elevation colour (H) - The point cloud will be coloured based on the point elevation in all LAS files using a scalar field from blue to red, where the bluest points are the lowest, and the red points are the highest elevation points inside the files.
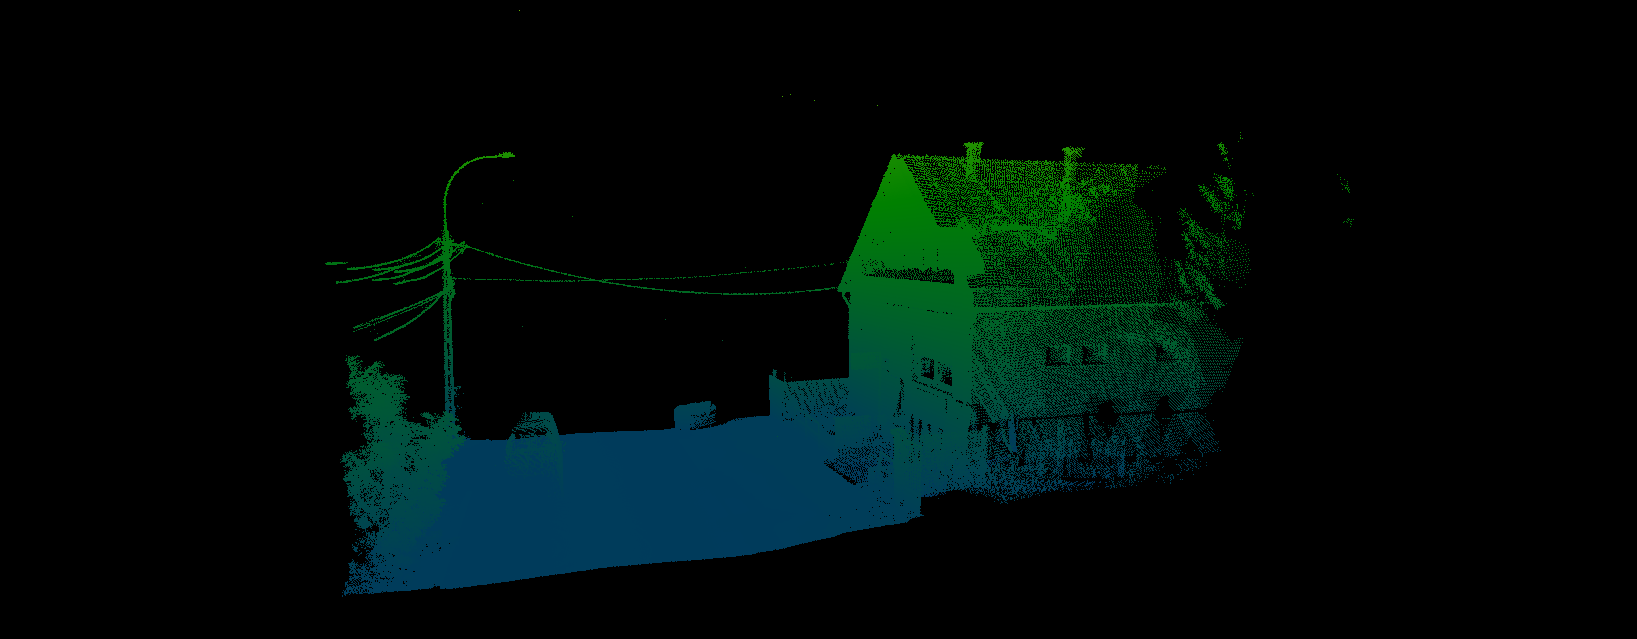
- Intensity Colour (I) - The point cloud will be coloured based on the point intensity value in all LAS files using a 16-bit scalar field (between 0 and 65535), where the lower intensities are blue and the higher intensities are red.
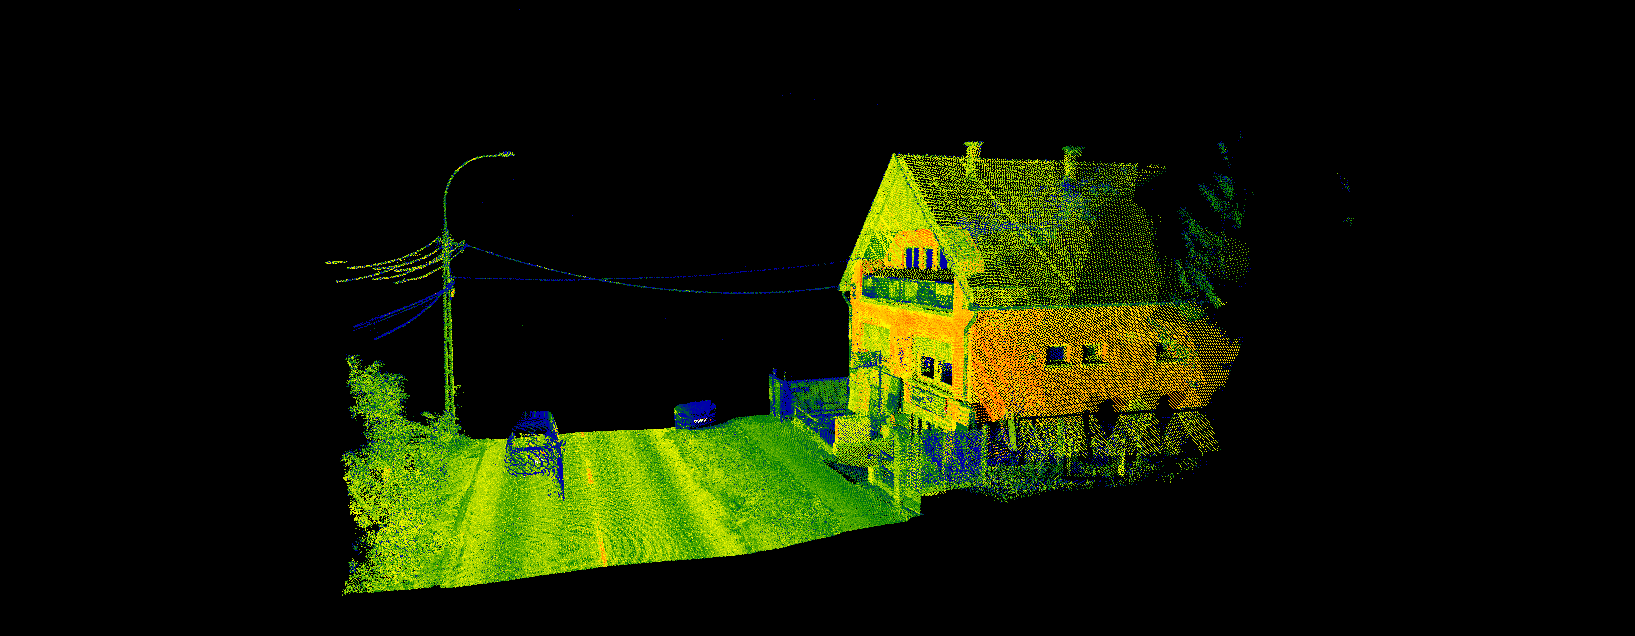
Some post-processing environments are not capable or not set to export the intensities to a 16-bit range, and the intensity value in the LAS file might be 2-4-8-bit, which significantly reduces the usability of the intensity colouring. In these cases, the normalizer shall stretch the available intensity range to a 16-bit range (histogram transformation). If the intensity range is focused on the lower range of the histogram, the cloud might look nearly completely blue because of the low values.
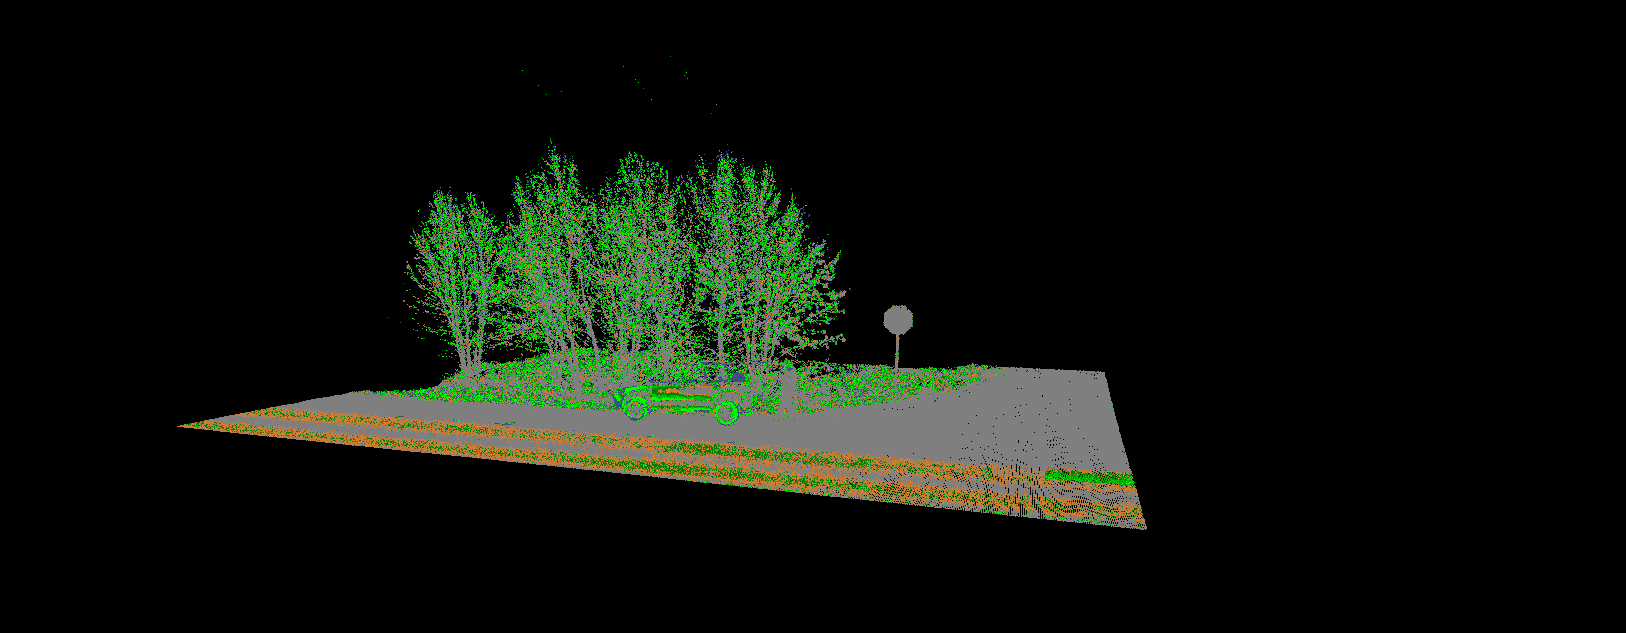
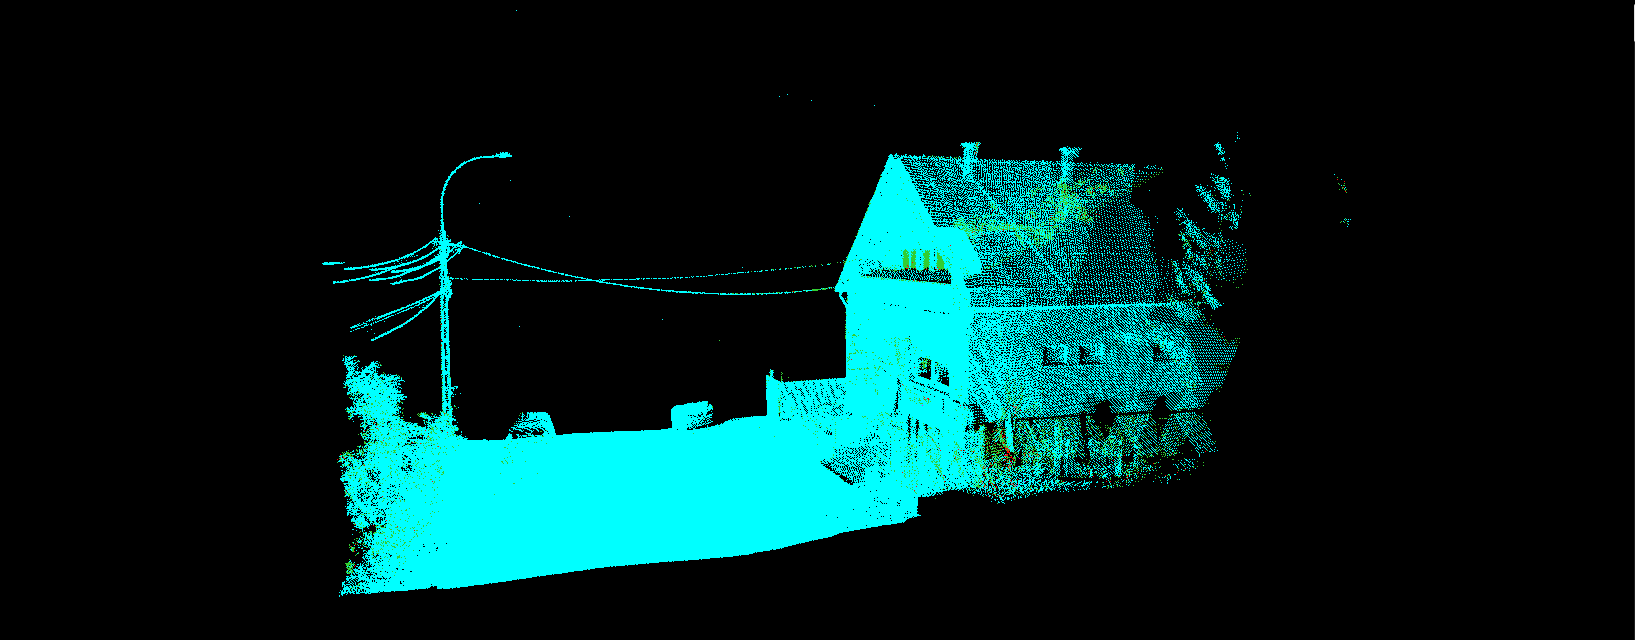
- Classification Colour (C) - The point cloud will be coloured based on the point class value in all LAS files. In an LAS file, the points can have a class value between 0-255, and each value has an assigned colour in PCS. If the point cloud is not classified, this colouring will result in a single colour point cloud, as most commonly, an unclassified point cloud has 0 or 1 class assigned for all points.
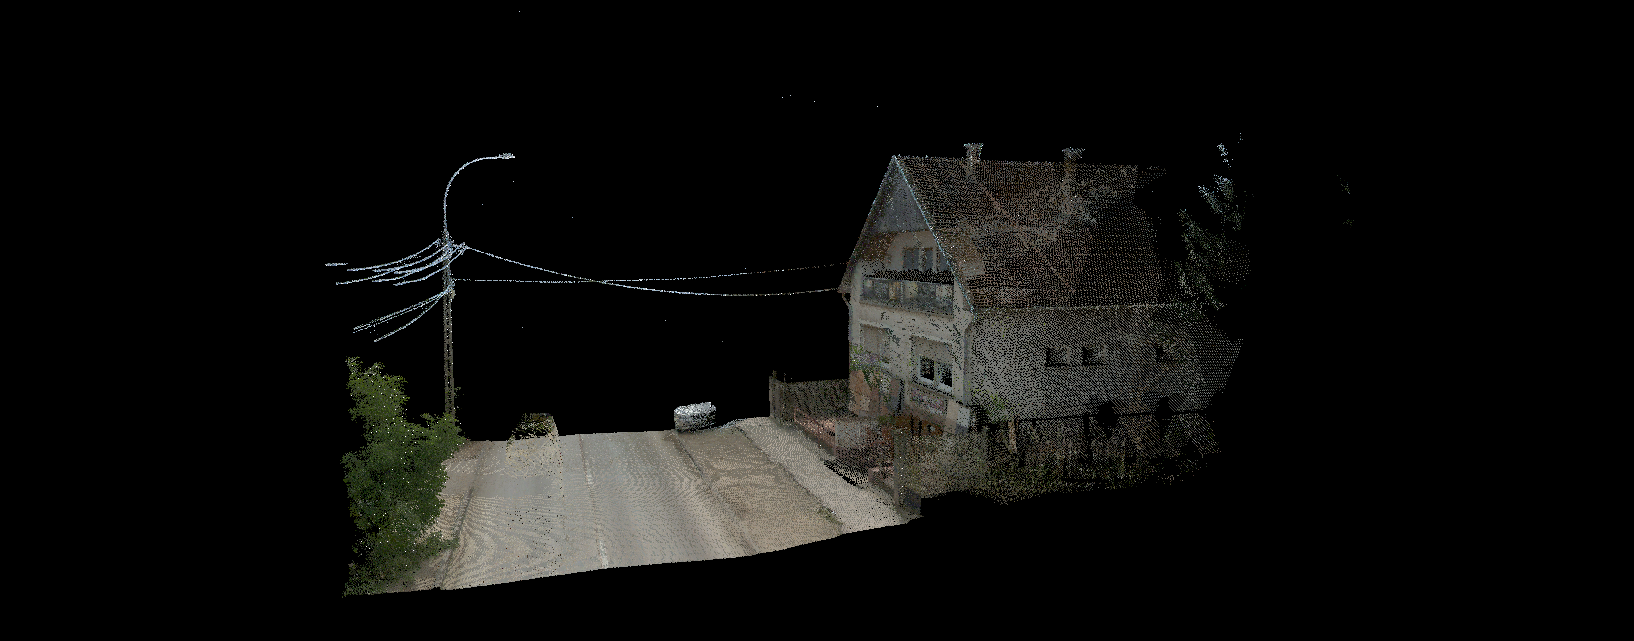
- RGB colours (RGB) - The point cloud will be coloured based on the actual colour of the points based on the photos taken during the survey. The colours are stored in a red-green-blue attribute for each point. If the RGB values are not coded to the LAS file, this colouring will result in a grey point cloud.
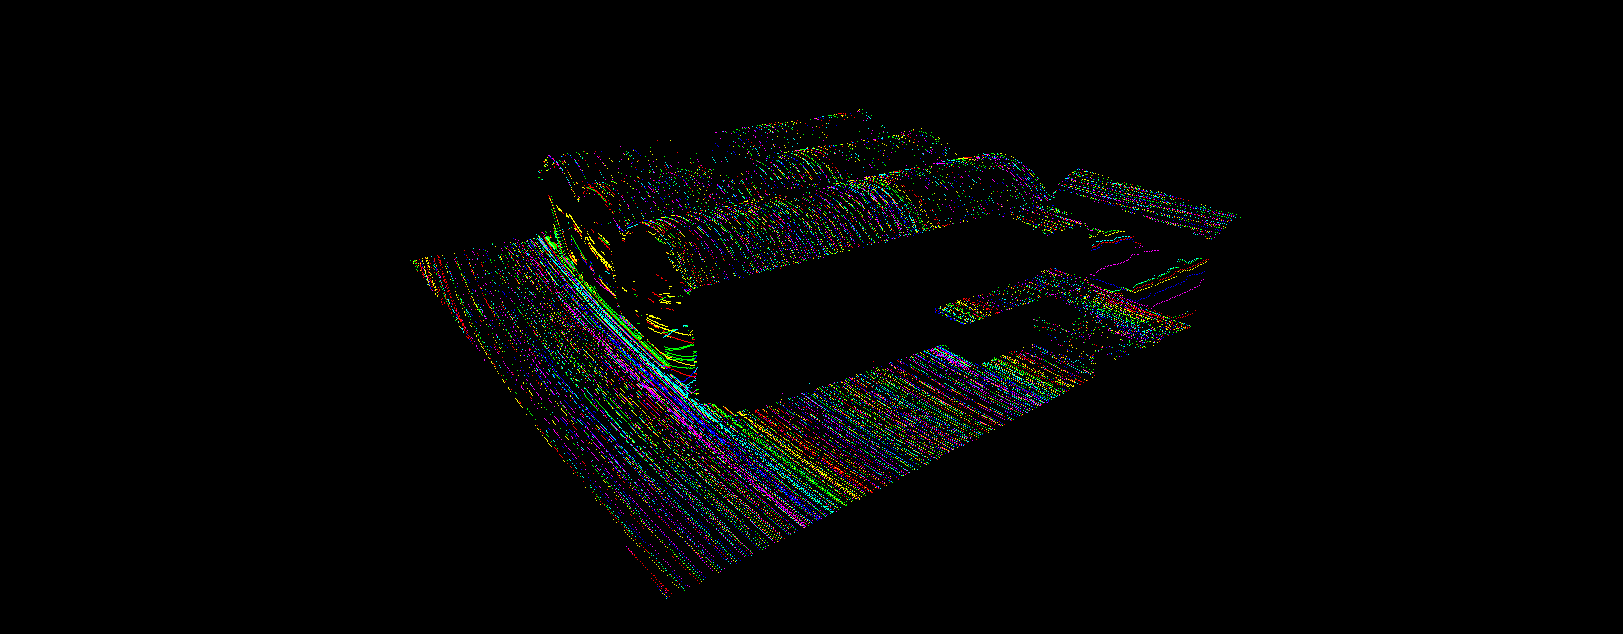
- Return number (R) - The point cloud will be coloured based on the laser shot's return number.
Some laser devices can record multiple points from a single laser shot. If so, the post-processing environment can write this information to the LAS file. In that way, the software can only visualize the first, second, third, and Nth points. If the laser device is incapable of this feature or the post-processing environment did not code this to the LAS file, this colouring will result in a single colour cloud.

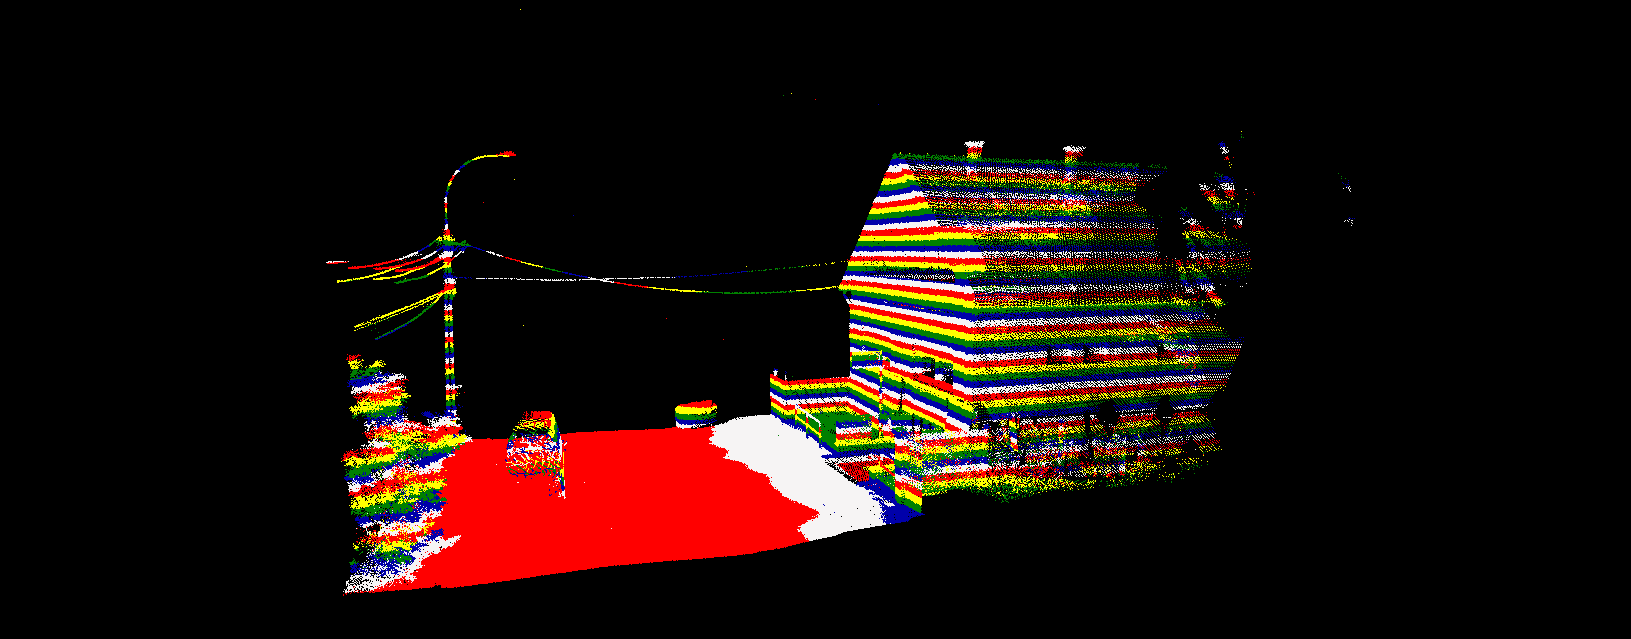
- Number of returns (P) - The point cloud will be coloured based on the number of returns from a single laser shot.
In the previous colouring, each Nth point receives a different colour. However, this colouring counts the number of returns from a single shot and colourizes based on the sum of the recorded points per laser shot.
- Flightline colouring (Fl) - This colouring can be used if the LAS file contains flightline information specific to airborne (ALS, ULS) scanning applications. Each flight line or laser line will be classified differently. The coding of this information in the LAS file is highly dependent on the post-processing environment.
- Default Colouring (cross arrows) - This colouring will assign a single colour for each LAS file separately. The user can adjust the colours of the LAS file(s) using the project explorer. This colouring is helpful if a misalignment is presented between LAS files or the user needs to identify an exact LAS tile.
- Elevation increment (E) - This colouring will set the colours of the point cloud based on elevation ranges. Each "layer" is 20 cm thick by default, which helps the user to identify elevation differences quickly. The elevation range can be customized, see below.
Blend with Intensity (I+) - This function allows users to blend the selected non-intensity colouring with the intensity values. This can be very useful when combining intensity with classification, for example. Please note that the software will use the default intensity scale (16-bit) during the intensity blending. If the cloud's intensity is weak, the colours in intensity mode are blueish, which will blend the intensity very dark, which would not hold too much information. In these cases, normalization might be recommended.
Colorizer settings - The colorizer panel allows the users to adjust the elevation further, the number of returns, the return number and intensity colouring options. The settings are arranged into four tabs. The active tab is always aligned with the current colouring option, which means if the intensity colouring is active, the intensity tab will be the default. Pressing Reset at any tab will restore the default values. Pressing OK will also apply the changes.
- Colors by Elevations
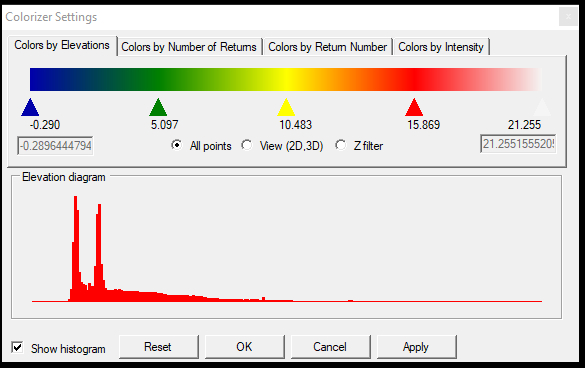
The default elevation setting sets the scale between the lowest and the highest point. The user can adjust the scale to a lower or higher range by clicking and dragging the little triangles based on the needs.
Selecting the Show histogram option will display the elevation histogram for the loaded clouds.
The All Points option will take into account all points in all files. The View (2D,3D) option will adjust the elevation scale to the currently visible points. The Z filter option allows the user to specify the min and max Z values, and only those points that fall between the min and max values will be presented. This can also be used with other colouring options to limit the display of the point clouds.
- Colors by Number of Returns
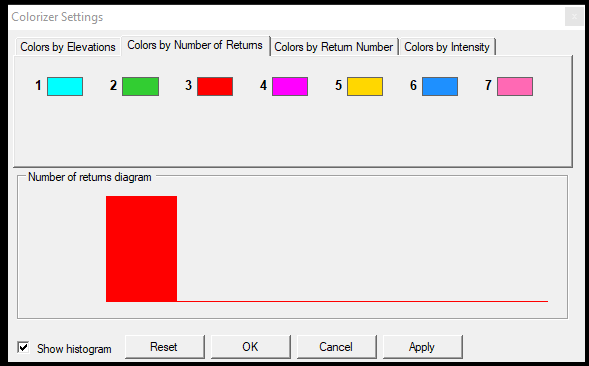
The colours can be modified by double left-clicking on the rectangle and picking another colour. If the LAS file(s) does not contain the number of return information, the whole cloud will turn cyan. If the Show histogram option is checked, the histogram of the Number of Returns is displayed.
- Colors by Return Number

The colours can be modified by double left-clicking on the rectangle and picking another colour. If the LAS file(s) does not contain the return number information, the whole cloud will turn to cyan. If the Show histogram option is checked, the histogram of the Return Number is displayed.
- Colors by Intensity
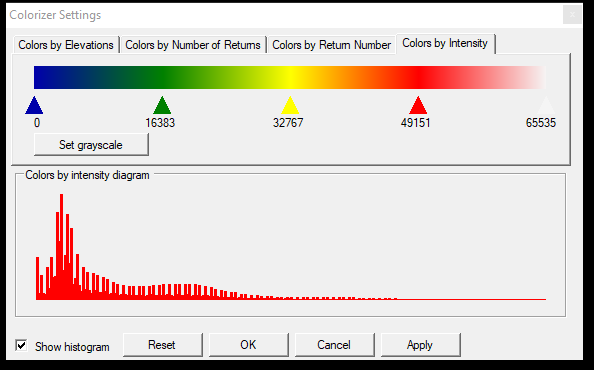
The intensity range is set to a 16-bit range (between values of 0 and 65535). You can adjust the display by clicking and dragging the triangles. It is recommended to set the intensity ranges lower in general, as extracting information from a blueish-greenish cloud is easier than a yellowish-reddish one. Please note that the intensity experience may vary depending on the sensor, the post-processing environment and the conditions during scanning.
The software can handle 8-bit intensity ranges as well, in that case, the functionality is the same, but the scale numbers will not change.
Selecting the Show Histogram option will display the histogram of the intensities of the loaded point clouds that can help set the triangles.
If the user presses the Set greyscale button, the scale turns greyscale. To go back to colourful, press the reset button. This affects the intensity colouring and can be reset only from the Colorzier Settings.
Grayscale On/Off - This function turns the greyscale on or off for all visualisation. This function is not the same as the Set Greyscale function at the Colorizer settings, as this turns ALL visualisation to greyscale. This function only affects the 2D view.
Sepia On/Off - This function turns the sepia filter on or off for all visualisation. This function only affects the 2D view.
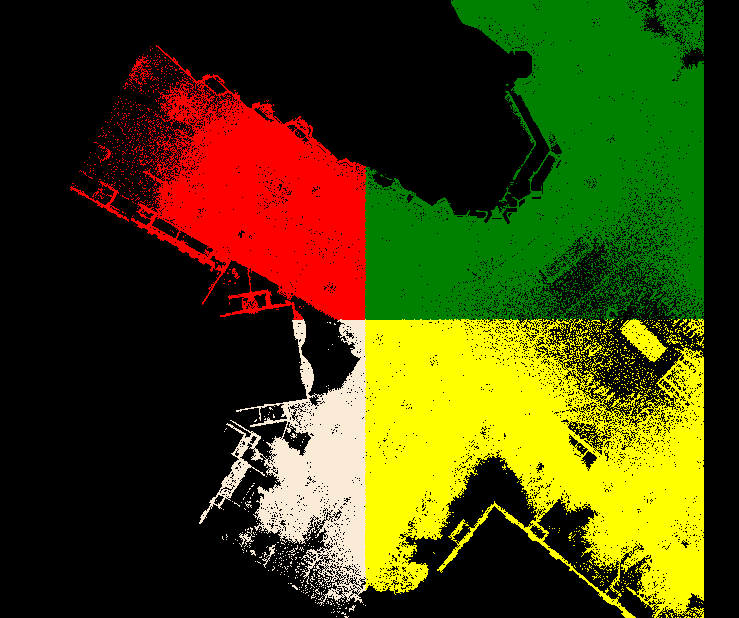
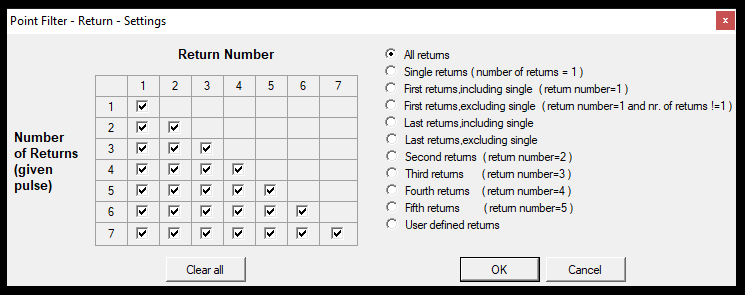
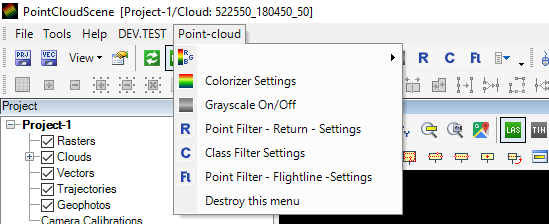
Point Filter - Return - Settings - This setting allows the user to filter the points by return number. The user can visualise the first, last or any other return by setting the configuration matrix.
Class Filter Settings - This setting will bring up the classification filter settings where the visualised classes can be set for each view, and the default colours and names can be modified.
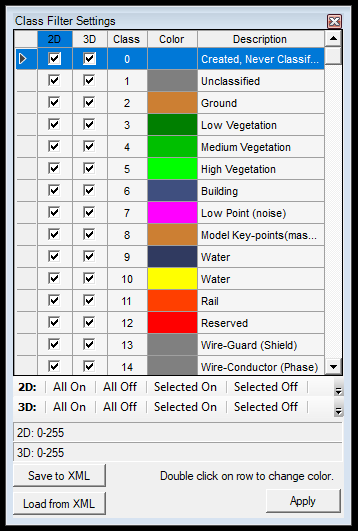
Checkboxes can be seen for 2D and 3D views inside the class filter settings. If the checkbox is checked for the respective view, the class will be visible in that view, if unchecked it won't. This setting can be different for 2D and 3D views. For example, in 2D view, the user can only see the ground class, but in 3D view, see all the points.
The Class number represents the class inside the LAS file, and it can be a value between 0-255, so a total of 256 classes can be written to an LAS file. The colour and description can be changed by double left-clicking on them. Please note that the colour and description are unique to the PCS, as only the class number is stored in the LAS file. The settings (on-off, colours, descriptions) can be saved to an XML file and loaded from an XML file. This PCS-specific XML file can be used only for this purpose and can be carried to other PCs if the user requires it over another PC.
A few pre-set options are also available under the table for quickly turning on and off all or selected classes. To select multiple classes, use CTRL (for selecting single records) or SHIFT (to select multiple records) from the classes.
Pressing Apply will apply the changes, but closing the window will not.
Point Filter - Flightline - Settings - This window allows the user to change the flightline colours, like the return number colouring panel for each flight line.
Point Filter - Elevation - Settings - Set a value for the elevation increment display.
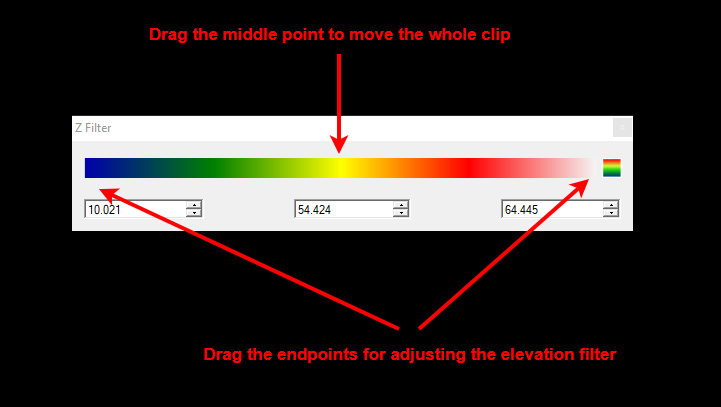
Z filter - The user can adjust the displayed (both for 2D and 3D views) point clouds based on elevation. The user can enter manually elevations for lower and upper fields, and the software will hide below or above the selected elevation. The user can use the colored bar to drag the ends with the left mouse click to limit the displayed elevation or drag the centre point of the bar to move the “slice” up and down. The changes, as long as the user clicks and holds the left mouse button, are instantly displayed in the 3D view.
Trajectory step dropdown menu - This menu is designated for users who like to use the clip frame to go along in a trajectory. The function requires an active trajectory. This functionality is currently not available.
Export Hillshade - Export a Hillshade raster from the point cloud. It is recommended to be used only with low-density or ALS datasets. A detailed description of this tool can be found here.
Export Raster Image - Export a raster image from the 2D view as a georeferenced TIFF file. A detailed description of this tool can be found here.
Export Lattice Model - Export a lattice or grid from the point cloud with the given settings to simply the cloud or surface. A detailed description of this tool can be found here.
Export LAS Bounded by Shape - Export a point cloud part to a new LAS file based on the active polygon shape. A detailed description of this tool can be found here.
Export Image Bounded by Polygon - Export a raster image using a general position plane. This tool allows users to export vertical and horizontal rasters like facades or layout plans. The output raster will not be georeferenced. A detailed description of this tool can be found here.
Create Popup - This button creates a menu from this toolbar to the top of the menu bar if needed. If the menu is not required, it can be removed by selecting Destroy this menu option.
Toolbar Options - This little black triangle allows you to customize the toolbar and add or remove buttons upon demand.