¶ Basic extraction guide
In this guide, we explain the basic steps of how the user can extract vectors from point clouds, what are the essential point cloud extraction tools, and so on.
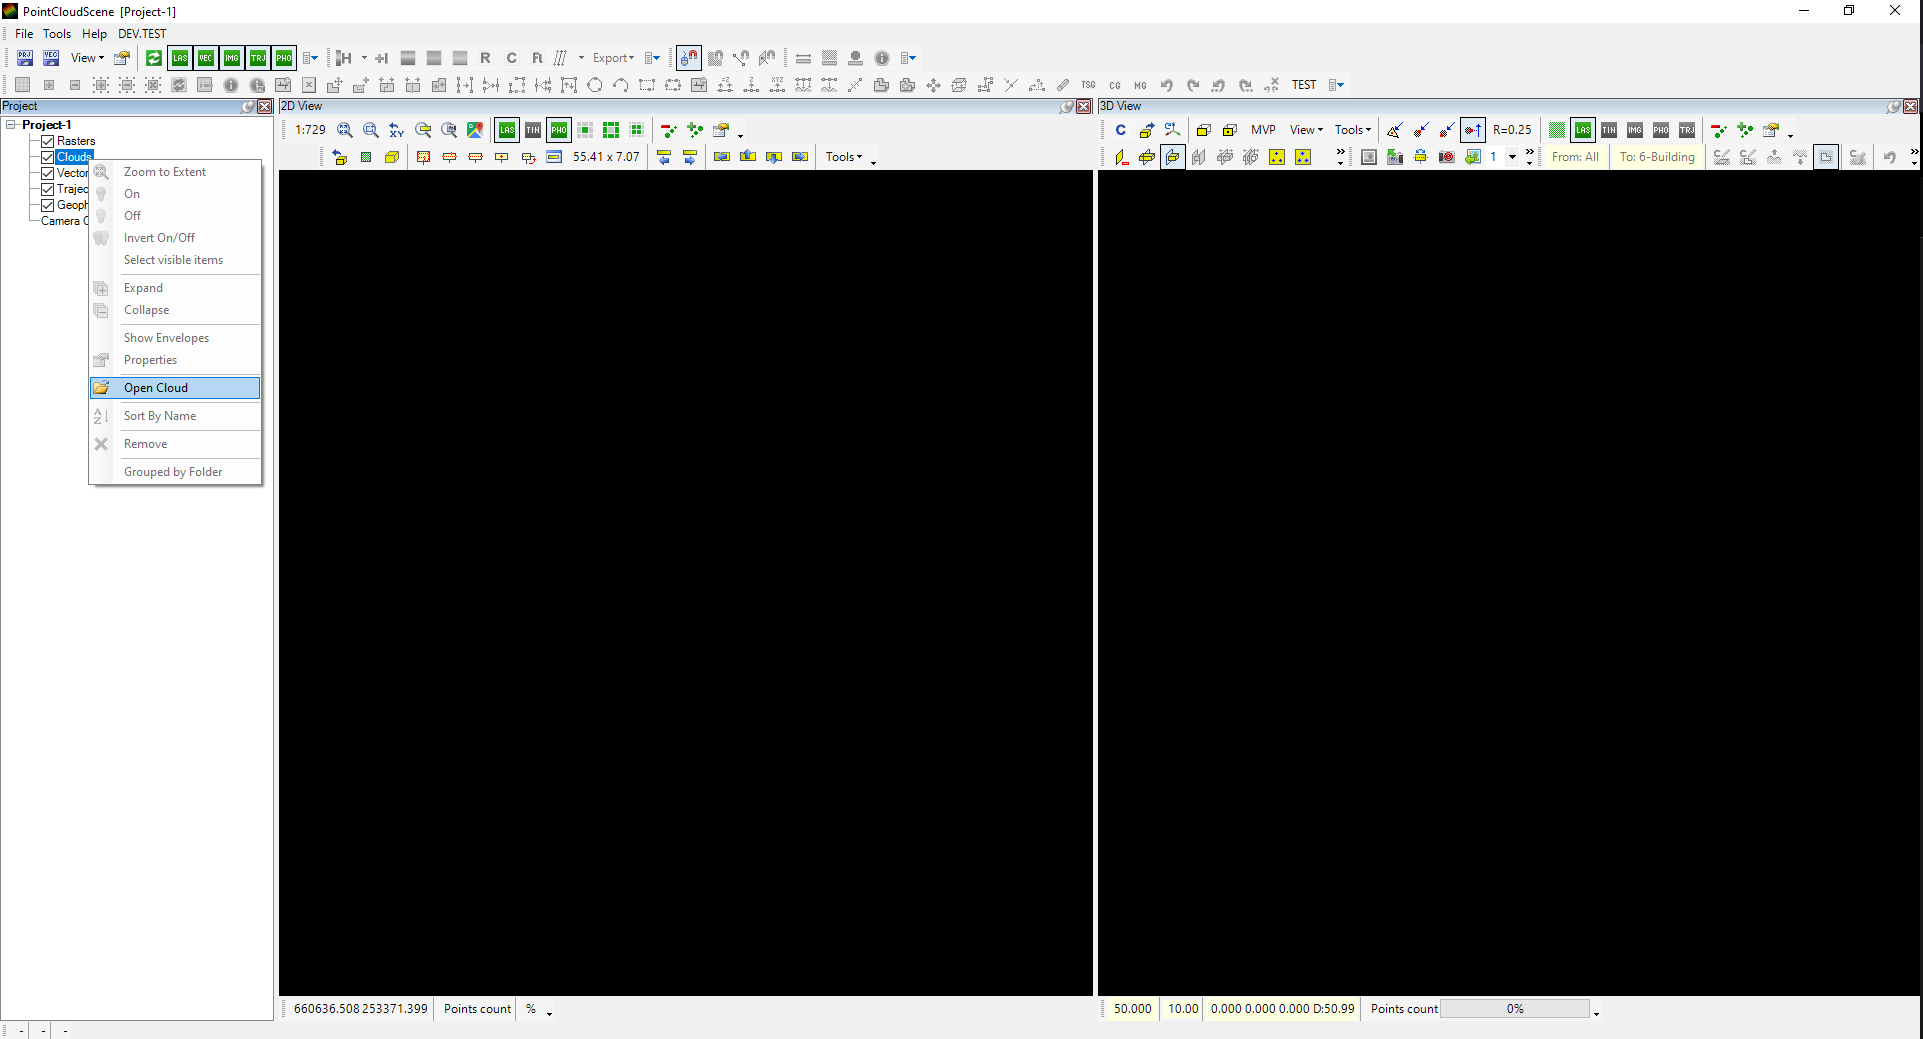
After the installation of the software and the first successful start, the user probably starts from scratch, so creating an empty project is needed. After making the project, the user must load source data to extract information. Point clouds are used most commonly, but rasters can also be used. To open data, use the project explorer, where the user selects the respective category, right-click on it, and select the Open Cloud or Open Raster option from the dropdown.
After loading a point cloud, the user can adjust the display of the point cloud using the point cloud toolbar. In most cases, the intensity, elevation or RGB colouring is the most suitable for extraction.
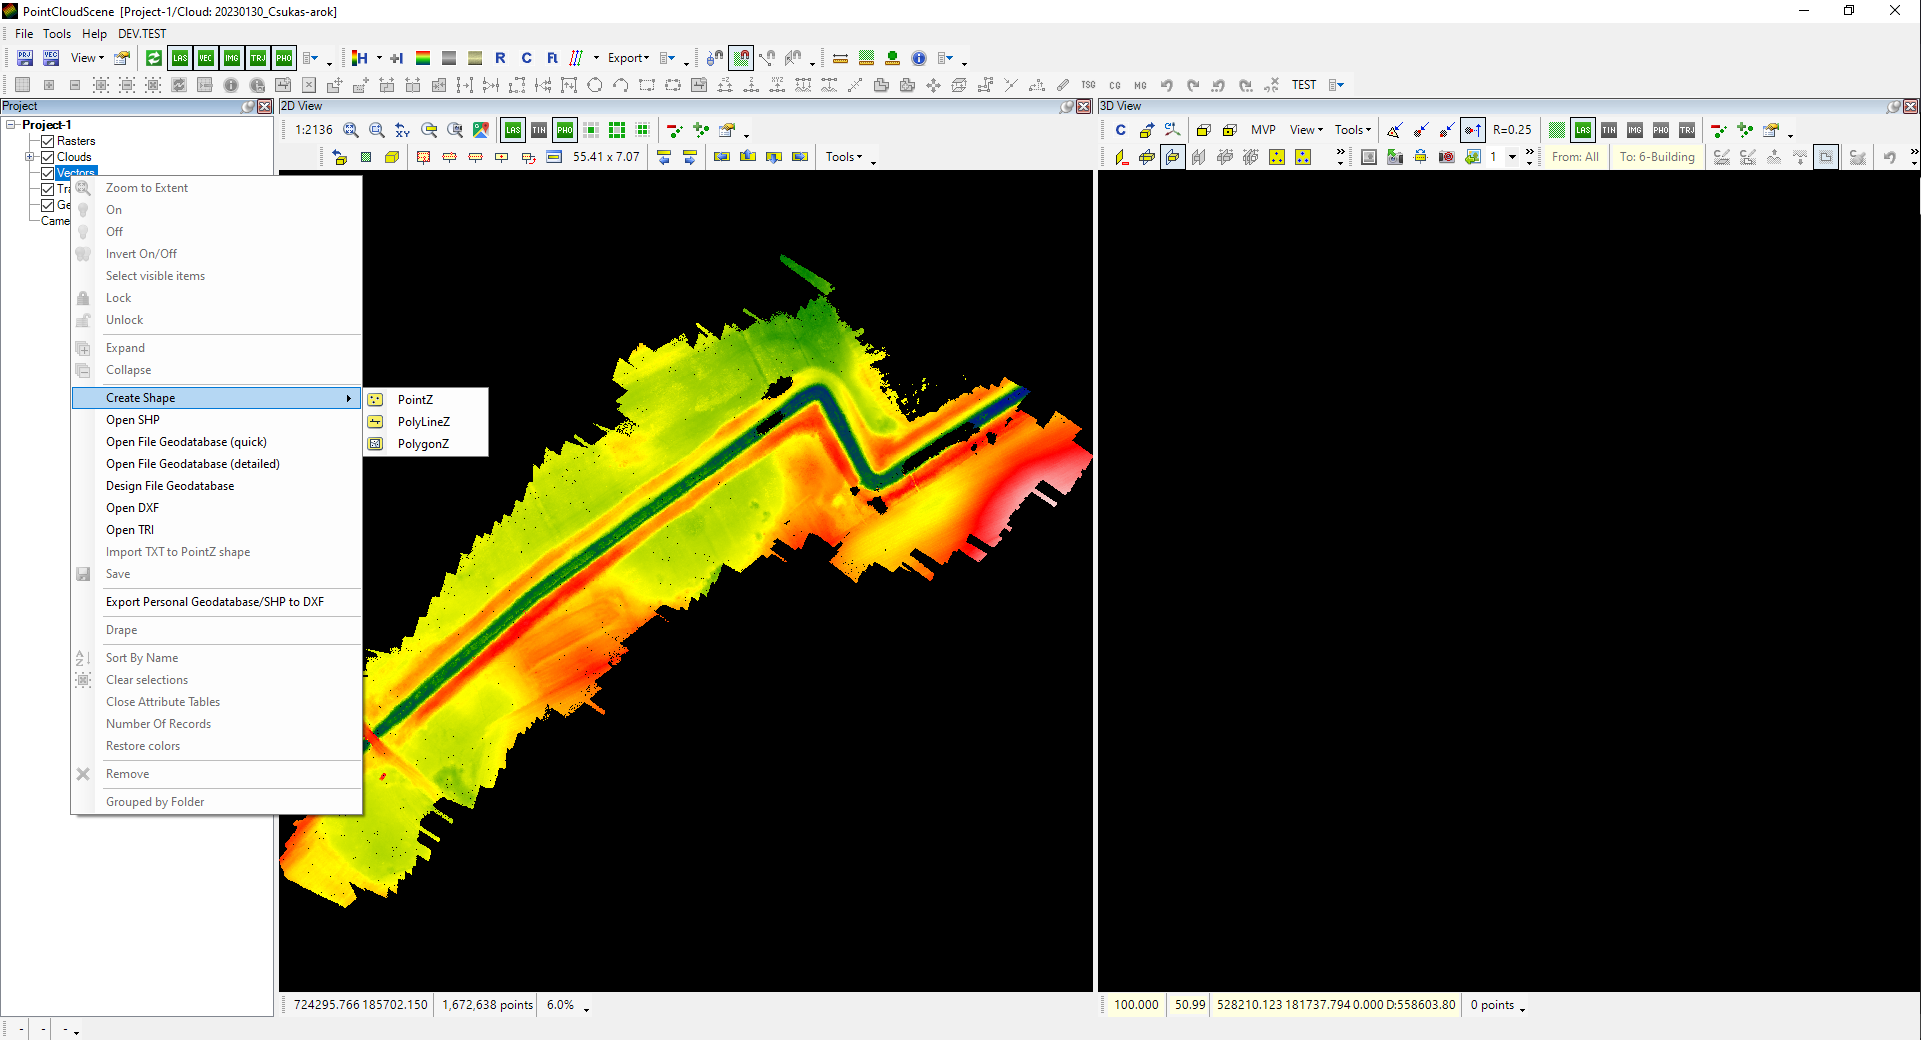
After opening the cloud, the user will need a vector layer to work with. Most commonly, this will be an SHP file. SHP files from external sources can be used, or new SHPs can be created by right-clicking on the Vectors and selecting the Create SHP option, where point, polyline, and polygon types of SHP can be created. The created SHP will be empty and will only contain an ID attribute.
The user can start extracting the vectors after creating or opening one or more SHP files. In the basic guide, we do not discuss using the attribute tables and modification of the attribute table structure. Please check the advanced extraction guide for a detailed description of this topic.
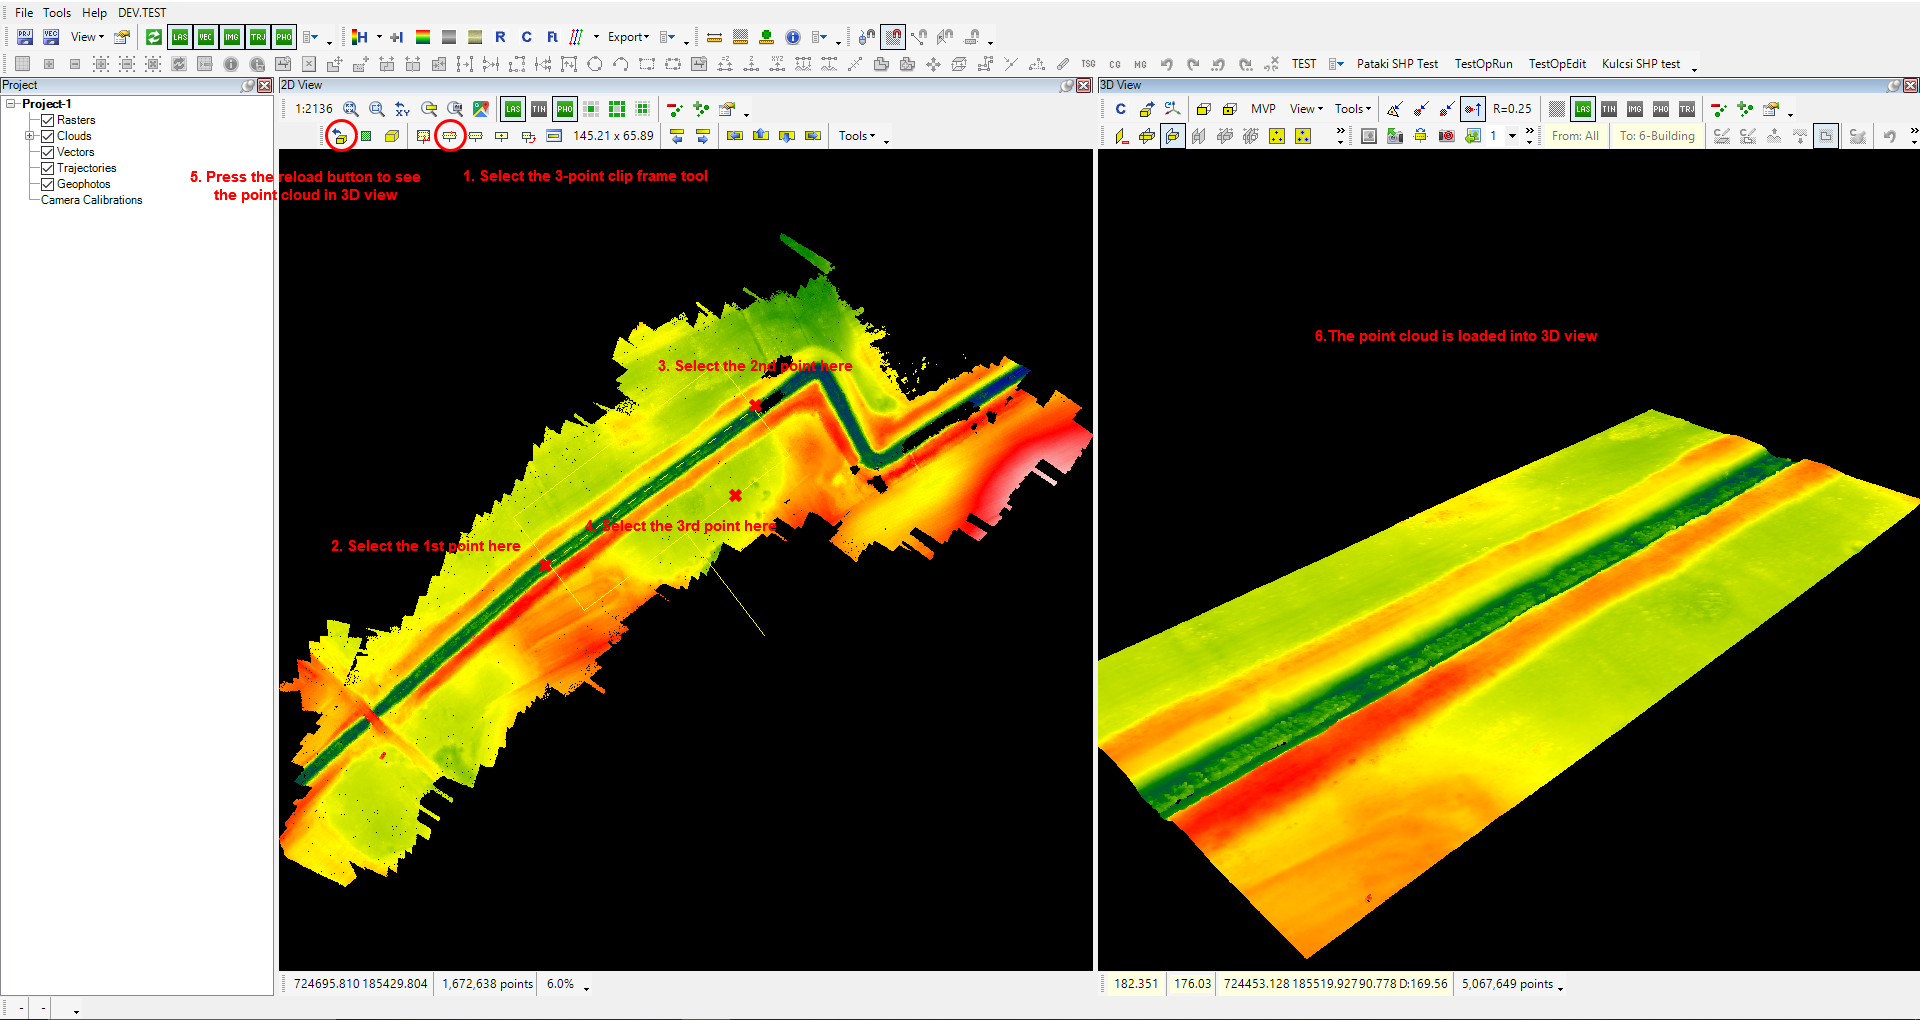
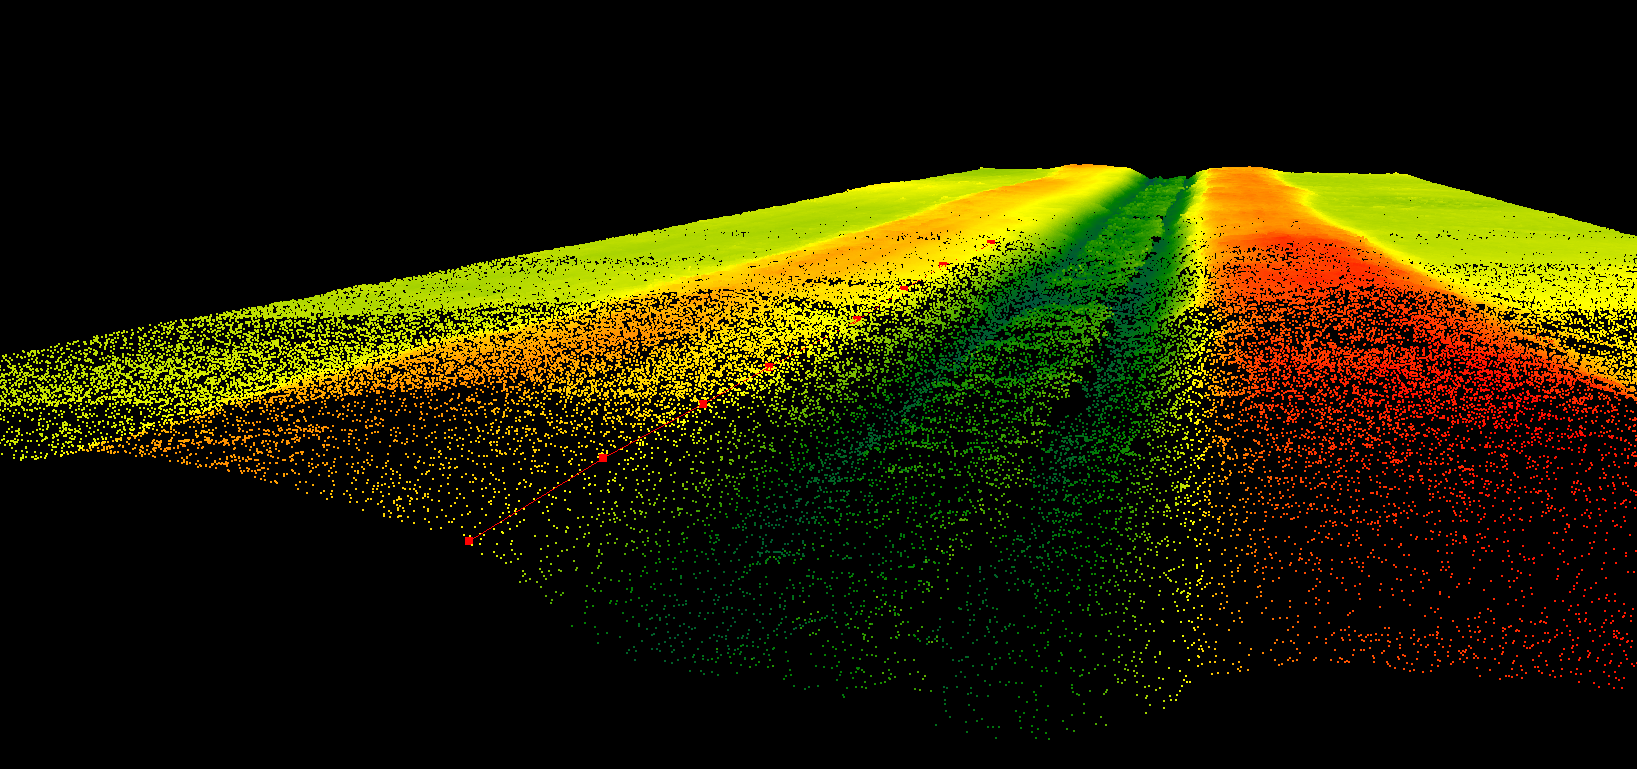
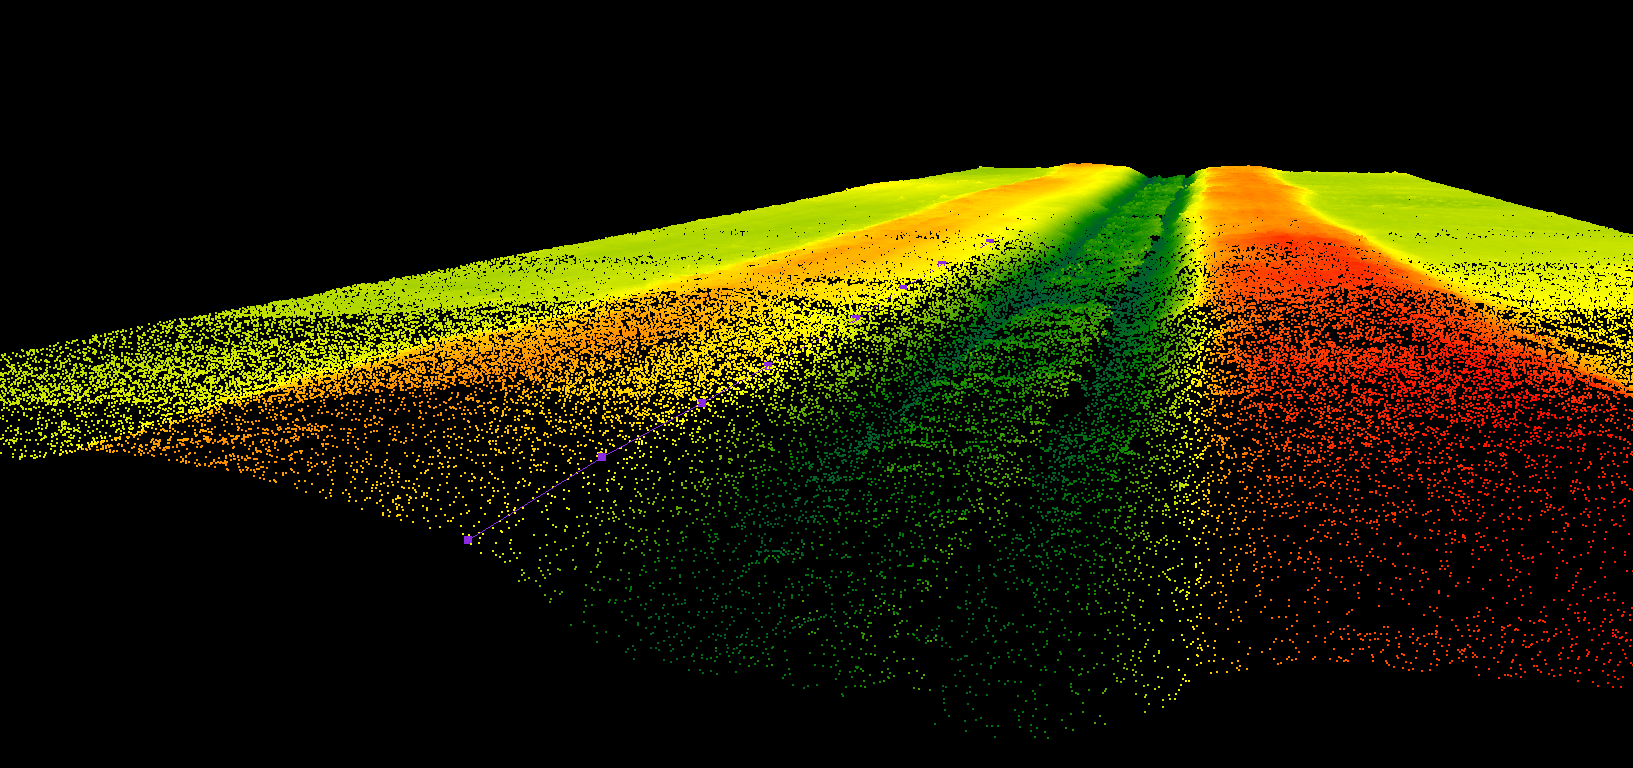
As seen in the image above, after loading the point cloud data into PCS, it is visible in 2D. To see the data in 3D, a clip frame shall be placed using the clip frame toolbar. The clip frame will control how much data will be loaded into 3D. For beginner users, we strongly recommend using the 3-point clip frame tool. Place the clip frame in the area which needs to be extracted or inspected in 3D. The basic quality of the point cloud data might affect how much data can be loaded into 3D. This might require some experimentation with different settings to find the optimum solution. We do provide sample settings in the clip frame toolbar article.
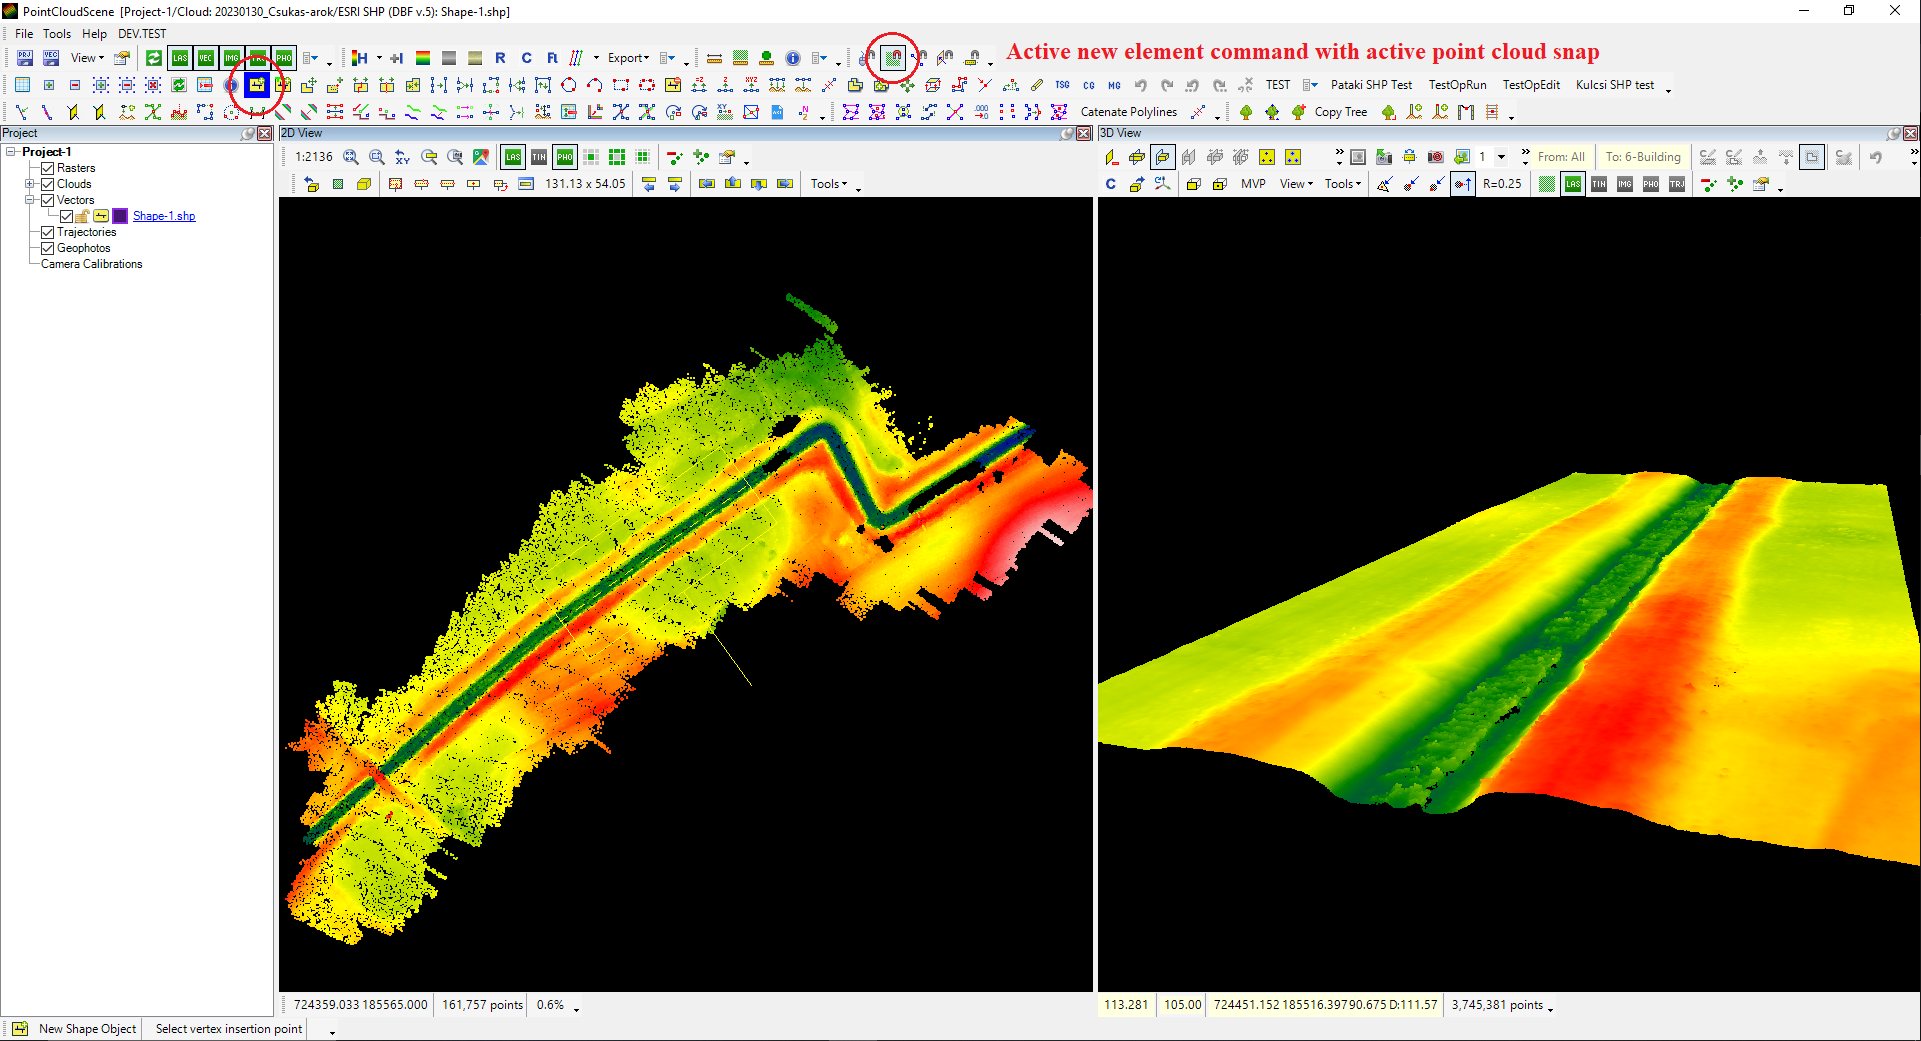
If the user has multiple SHP files, select the active SHP by double left-clicking over it and select the New Element from the Shape toolbar. Check the current snapping settings before starting the vector extraction. Understanding snapping is crucial for PCS; please read the respective article. For a quick start, we recommend using only point cloud snap mode to snap the new vectors to the point cloud.
Now, the extraction can be started in 2D or 3D view. For effective movement in 2D and 3D views, we recommend reading each view's article to understand the movement in both views. Please check the respective article to understand the rotation centre point in the 3D window. If points are being extracted, the user can place points in the point cloud, which will be placed instantly. If polylines are being extracted, the user will draw a red line as they click the point cloud points. This temporary line can be finalised if the enter button is pressed or a double left click has been used at the end of the line. The same applies to polygons.
The user can extract as many points, polylines or polygons as needed. Create multiple SHP files and extract the area according to the needs.
The following tools might be helpful during the basic extraction from the Shape Toolbar. Remember that the tools are snap mode sensitive; always pay attention to the current snap mode.
- Move Shape Vertex - Move a vertex to a new location
- Remove Shape Vertex - Remove a vertex from a polyline/polygon
- Join Shape Polylines - Join two polylines
- Split Shape Polylines - Split a polyline into two polylines
- Circle by 3 points - Draw a circle based on 3 points
- Rectangle by 3 points - Draw a rectangle based on 3 points
- Remove Item - Delete selected items
- Set Z - Set an elevation value for all of the vertexes inside a polyline/polygon
- Modify Vertex Z - Adjust one vertex's elevation visually on one of the views
- Drape - Drape the selected elements all vertex to the point cloud. For a better understanding of the drape functionality, check the draping article.
- Drape Vertex - Drape a single vertex. For a better understanding of the drape functionality, check the draping article.
- Copy Shape - Copy the selected element
- Undo/Redo - Undo or redo the actions
Also, it is recommended that the standard, point cloud and measure toolbar articles be used for some basic tool descriptions.
When the software prompts the save warning, always press Save All Vectors, and occasionally use the Save All option from the File Menu, as it will also save the project file.
After the extraction, the SHP files can be opened by other GIS software such as ArcMap, QGIS or CAD software like AutoCAD Map or Microstation.
If the user is familiar with the basic extraction steps, move to the Advanced Extraction Guide, which provides a deeper description of the software's toolset.